| Group |
Reference |
Name |
Description |
Visual |
| 1 |
100 |
Crack |
An imperfection produced by a local rupture locale à rétat solide en arise from the effect of cooling or stresses
|
|
| 1 |
1001 |
Microcrak |
A crack only visible under the microscope |
|
| 1 |
101 |
Longitudinal crack |
A crack essentially parallel to the axis of the weld |

|
| 1 |
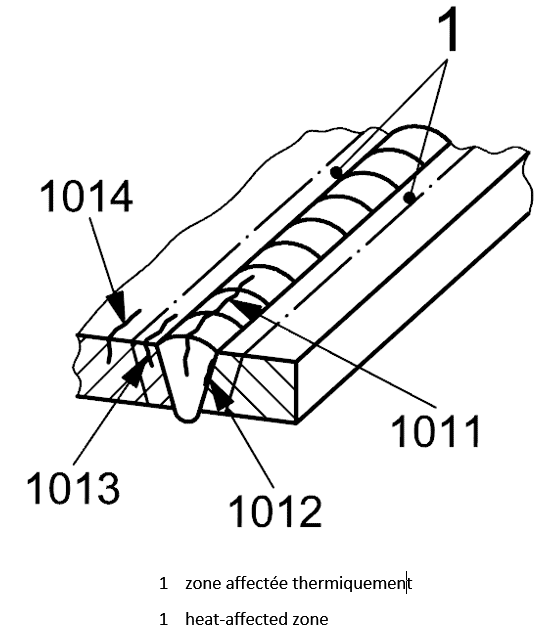
1011 |
Longitudinal crack |
A crack essentially parallel to the axis of the weld in the weld metal
|

|
| 1 |
1012 |
Longitudinal crack |
A crack essentially parallel to the axis of the weld
at the wetd junction
|

|
| 1 |
1013 |
Longitudinal crack |
A crack essentially parallel to the axis of the weld in the heat affected zone
|

|
| 1 |
1014 |
Longitudinal crack |
A crack essentially parallel to the axis of the weld in the parent metal
|

|
| 1 |
102 |
Transverse crack |
A crack essentially transverse to the axis of the weld |

|
| 1 |
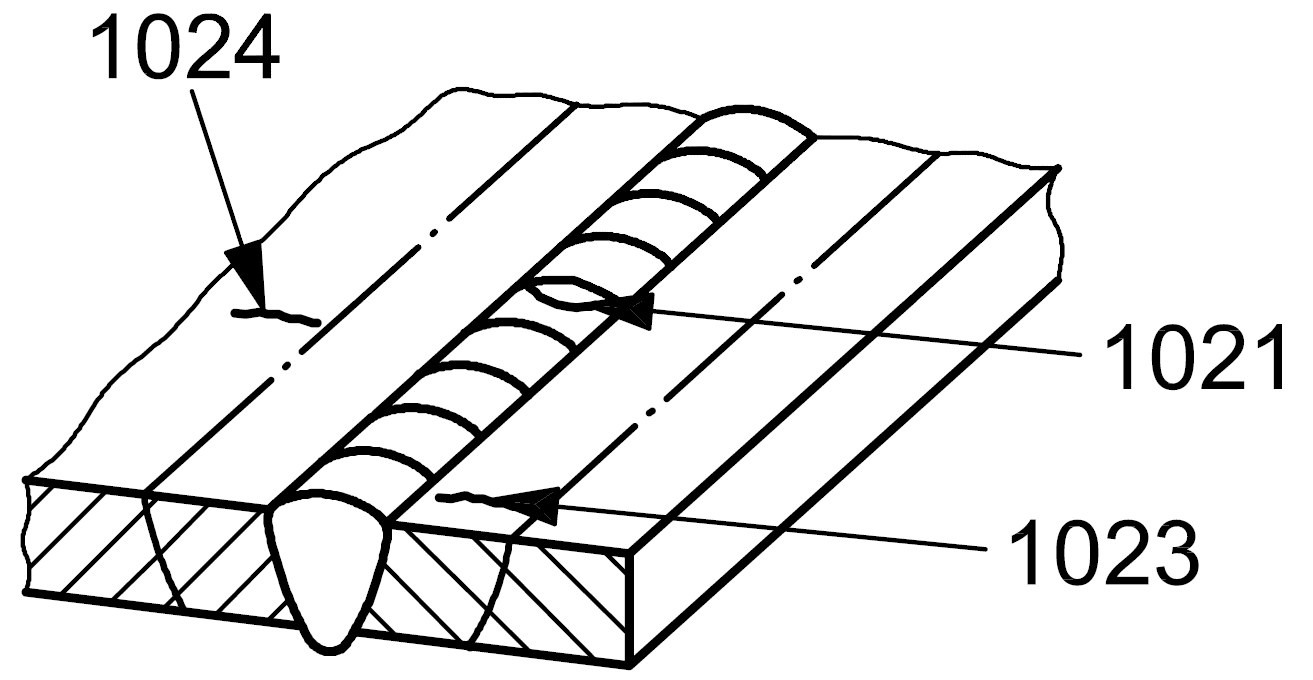
1021 |
Transverse crack |
A crack essentially transverse to the axis of the weld in the weld metal
|

|
| 1 |
1023 |
Transverse crack |
A crack essentially transverse to the axis of the weld in the heat affected zone
|

|
| 1 |
1024 |
Transverse crack |
A crack essentially transverse to the axis of the in the parent metal
|

|
| 1 |
103 |
Radiating crack |
Cracks radiating from a common point
NOTE - Small cracks of this type are called ‘star cracks'
|

|
| 1 |
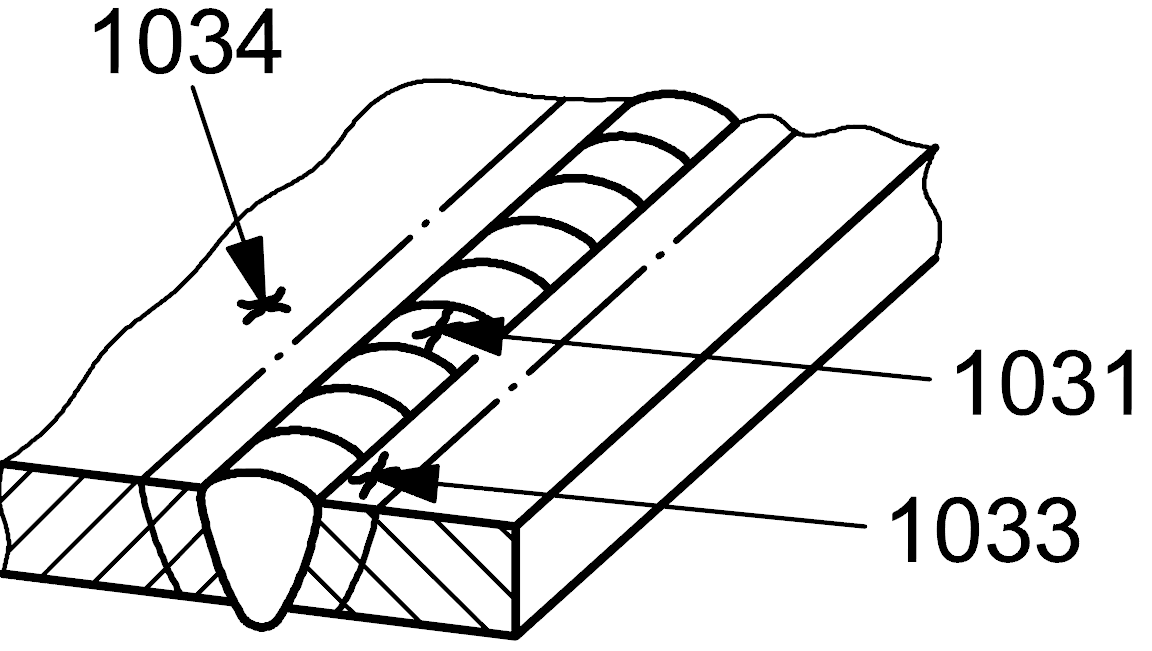
1031 |
Radiating crack |
Cracks radiating from a common point in the weld metal
|

|
| 1 |
1033 |
Radiating crack |
Cracks radiating from a common point in the heat-affected zone
|

|
| 1 |
1034 |
Radiating crack |
Cracks radiating from a common point in the parent metal
|
|
| 1 |
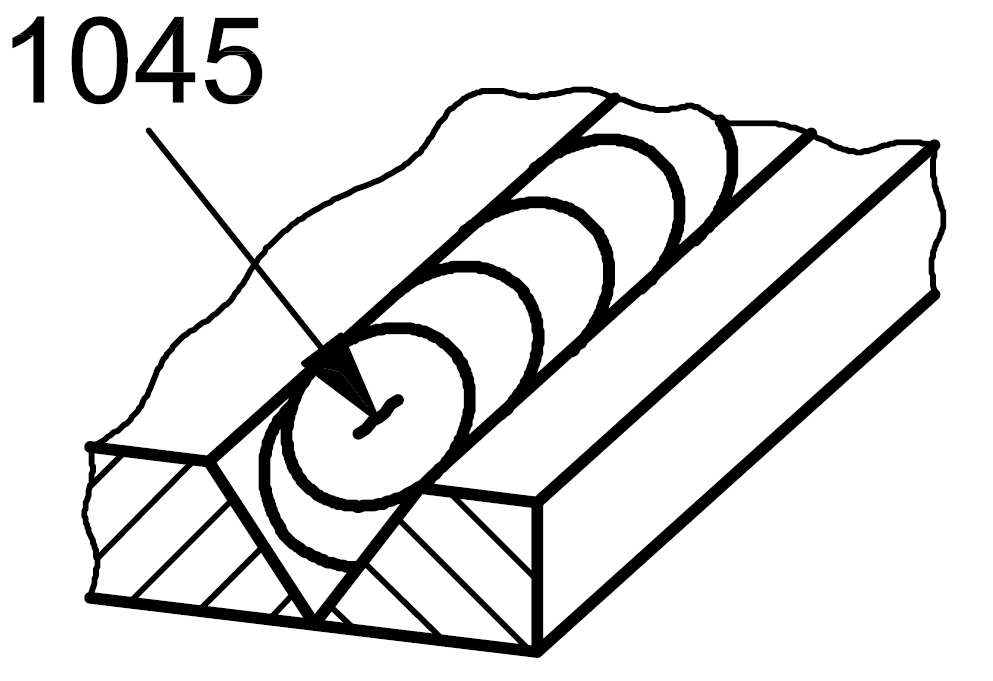
1045 |
Crater crack |
A crack in the crater at the end of a weld which longitudinal
|

|
| 1 |
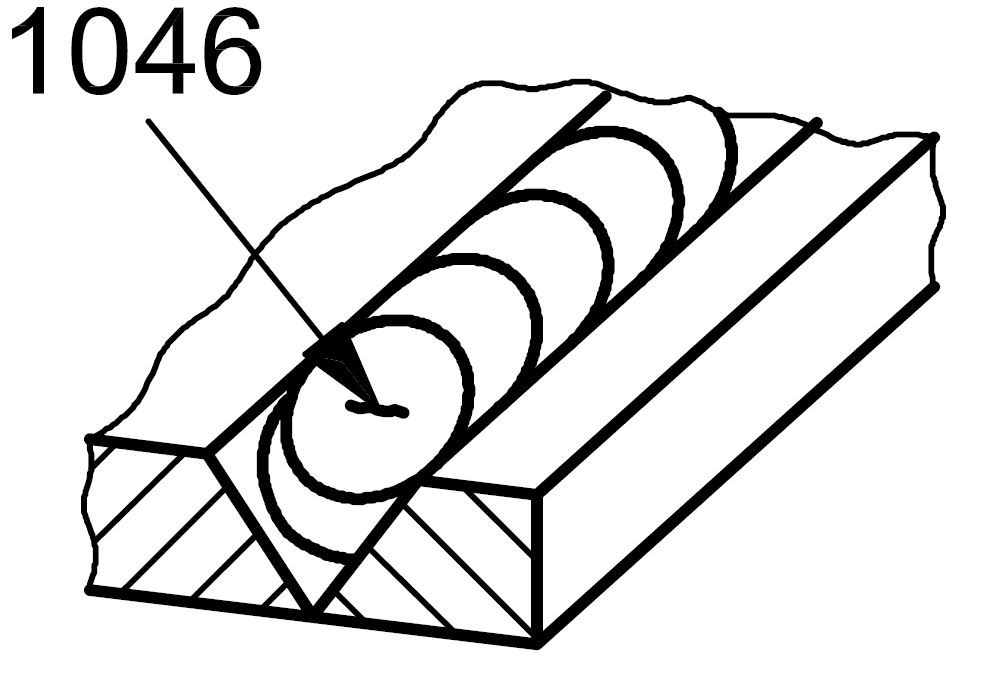
1046 |
Crater crack |
A crack in the crater at the end of a weld which transverse
|

|
| 1 |
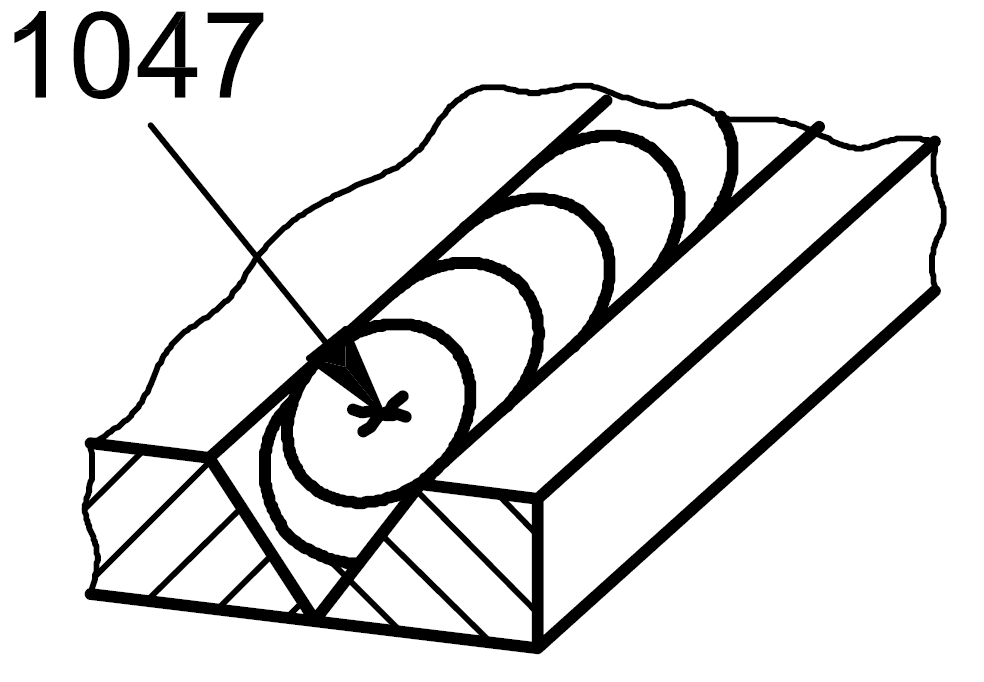
1047 |
Crater crack |
A crack in the crater at the end of a weld which radiating (star cracking)
|

|
| 1 |
105 |
Group of disconnected cracks |
Group of disconnected cracks in any direction |

|
| 1 |
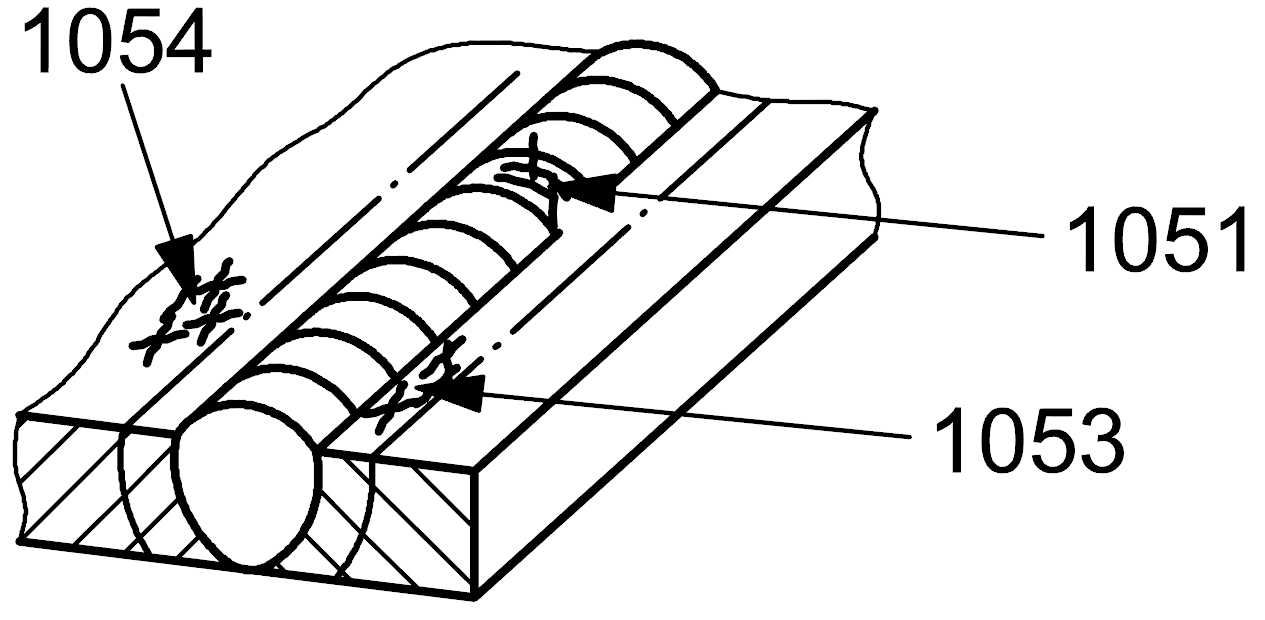
1051 |
Group of disconnected cracks |
Group of disconnected cracks in any direction in the weld metal
|

|
| 1 |
1053 |
Group of disconnected cracks |
Group of disconnected cracks in any direction in the heat affected zone
|

|
| 1 |
1054 |
Group of disconnected cracks |
Group of disconnected cracks in any direction in the parent metal
|

|
| 1 |
106 |
Branching cracks |
A group of connected cracks originating from a common crack and distinguishable from a group of disconnected cracks (105) and from radiating cracks (103)
|

|
| 1 |
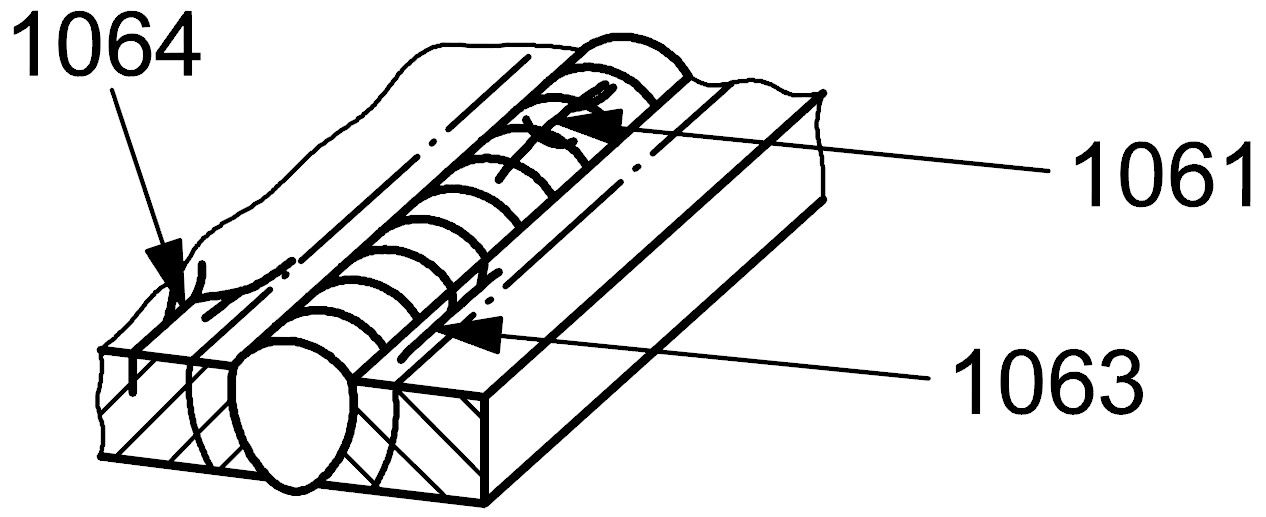
1061 |
Branching cracks |
A group of connected cracks originating from a common crack and distinguishable from a group of disconnected cracks (105) and from radiating cracks (103) in the weld metal
|

|
| 1 |
1063 |
Branching cracks |
A group of connected cracks originating from a common crack and distinguishable from a group of disconnected cracks (105) and from radiating cracks (103) in the heat affected zone
|

|
| 1 |
1064 |
Branching cracks |
A group of connected cracks originating from a common crack and distinguishable from a group of disconnected cracks (105) and from radiating cracks (103) in the parent metal
|

|
| 2 |
200 |
Cavity |
Cavity |
|
| 2 |
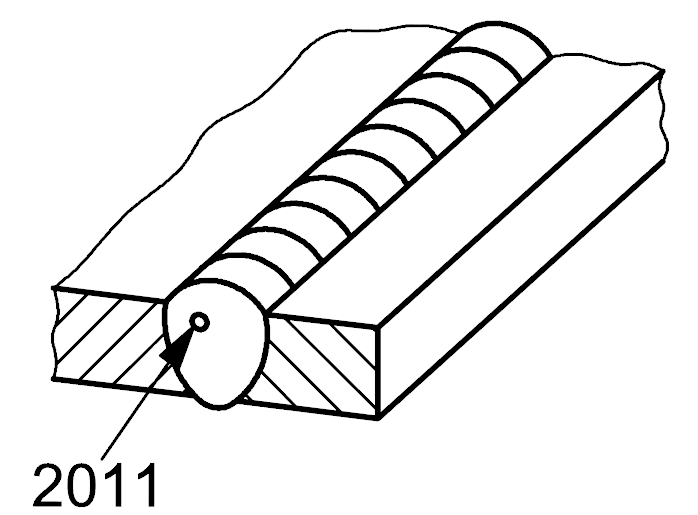
2011 |
Gas pore |
A gas cavity of essentially spherical form |

|
| 2 |
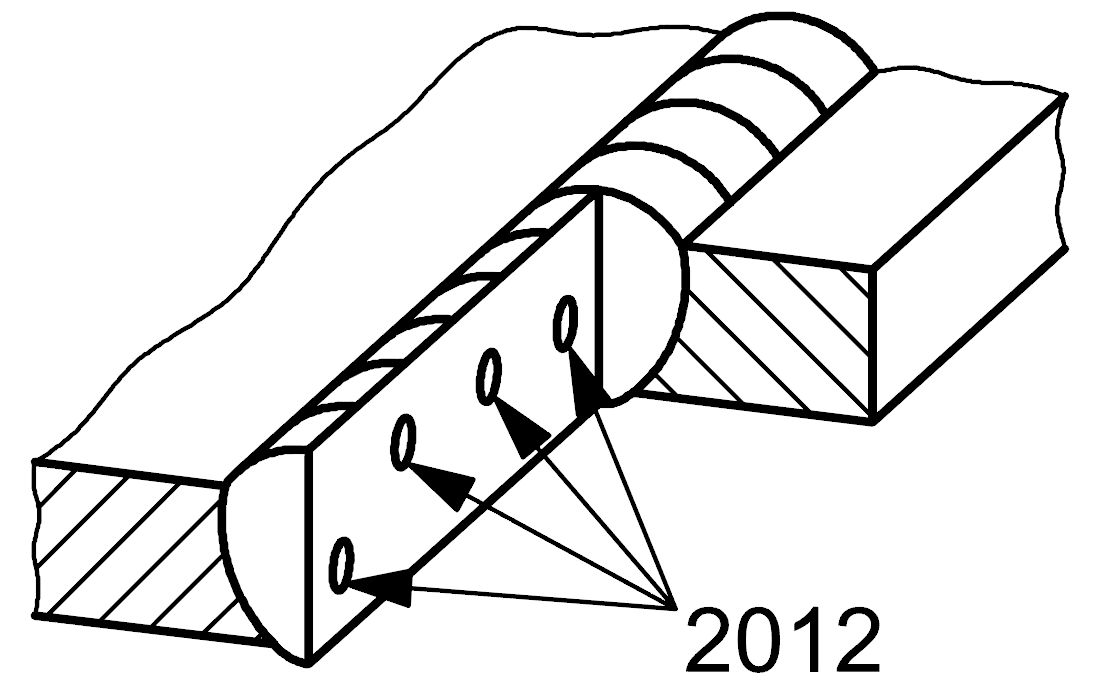
2012 |
Uniformly distibruted porosity |
A number of gas pores distributed in a substantially uniform manner throughout the weld metal; not to be confused with linear porosity (2014) and clustered porosity (2013)
|

|
| 2 |
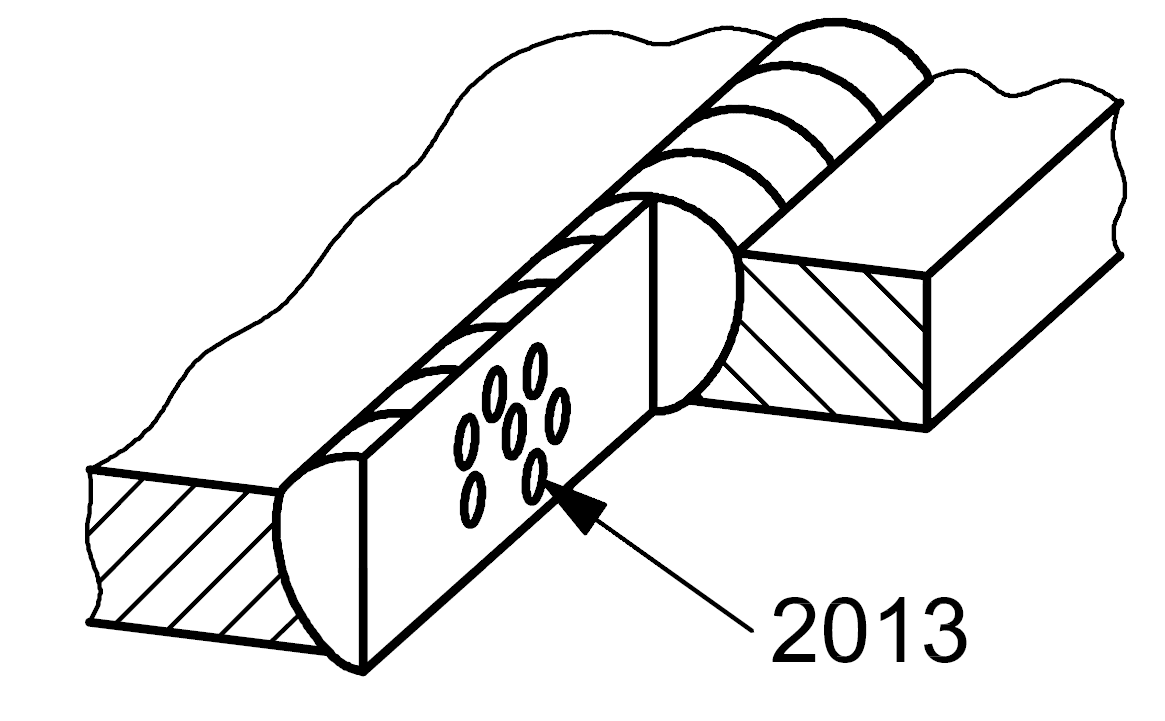
2013 |
Clustered (localized) porosity |
A group of gas pores having a random geometric distribution |

|
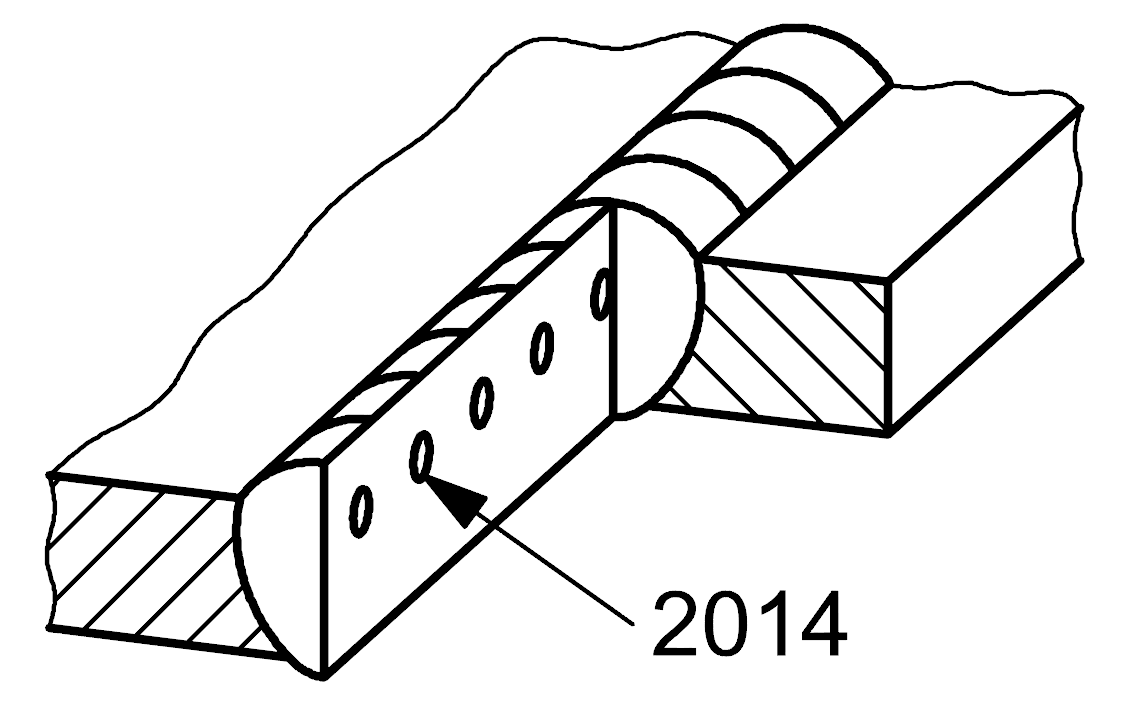
| 2 |
2014 |
Linear porosity |
A row of gas pores situated parallel to the axis of the weld
|

|
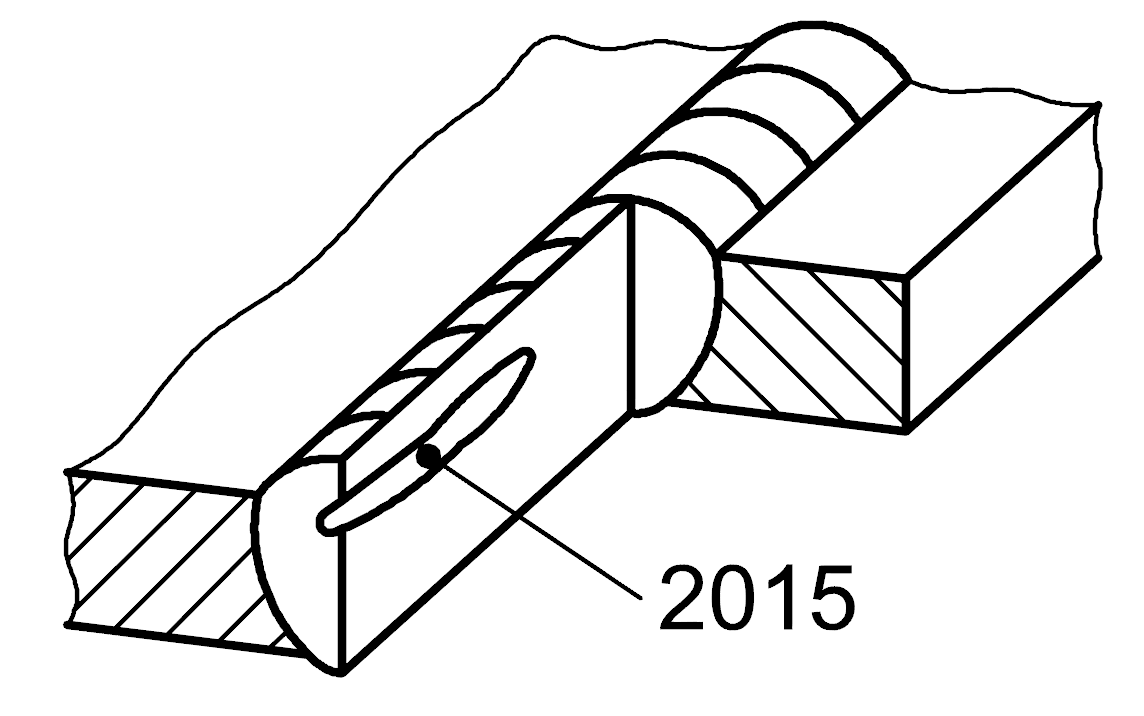
| 2 |
2015 |
Elongated cavity |
A large non-spherical cavity with its major dimension approximately parallel to the axis of the weld
|

|
| 2 |
2016 |
Worm-hole |
A tubular cavity in weld metal caused by release of gas. The shape and position of worm-holes are determined by the mode of solidification and the sources of the gas. Generally they are grouped in clusters and distributed in a herringbone formation. Sorne worm-holes may break the surface of the weld
|

|
| 2 |
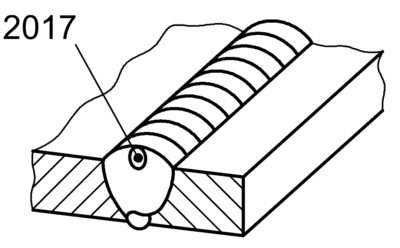
2017 |
Surface pore |
A gas pore which breaks the surface of the weld |

|
| 2 |
2018 |
Surface porosity |
Porosity appearing at the surface of the weld; single or multiple gas cavities that break the surface of the weld
|
|
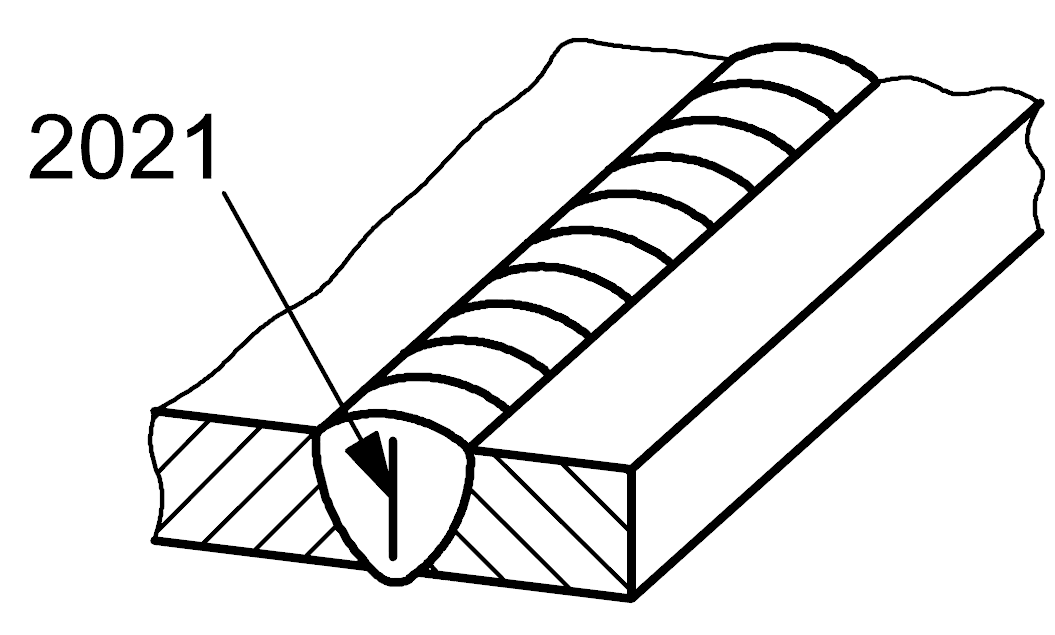
| 2 |
2021 |
Interdendritic shrinkage |
Elongated shrinkage cavity that can contain entrapped gas, formed between dendrites during cooling. Such an imperfection is generally found perpendicular to the weld face
|

|
| 2 |
2024 |
Crater pipe |
Shrinkage cavity at the end of a weld run and not eliminated before or during subsequent weld runs
|

|
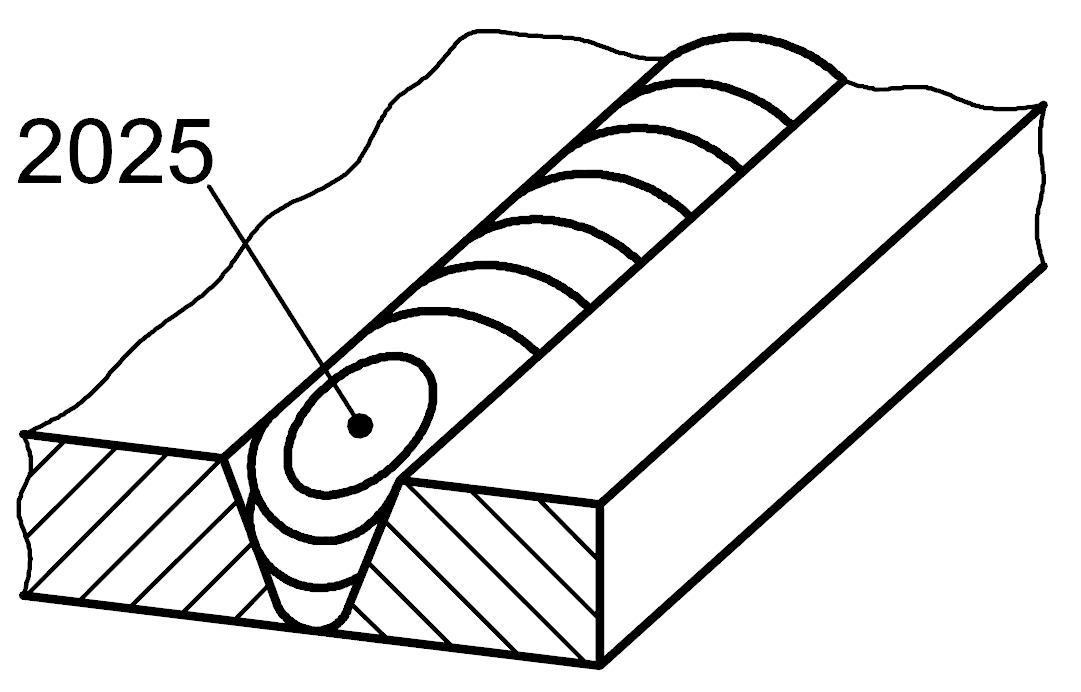
| 2 |
2025 |
End crater pipe |
Open crater with a hole reducing the cross-section of the weld
|

|
| 2 |
203 |
Micro-shrinkage |
Shrinkage cavity visible only under the microscope |
|
| 2 |
2031 |
Interdendritic microshrinkage |
Elongated micro-shrinkage formed between dendrites during cooling following the boundaries of grains
|
|
| 2 |
2032 |
Transgranular microshrinkage |
Elongated micro-shrinkage cavity crossing grains during solidification
|
|
| 3 |
300 |
Solid inclusions |
Solid foreign substances entrapped in the weld metal |
|
| 3 |
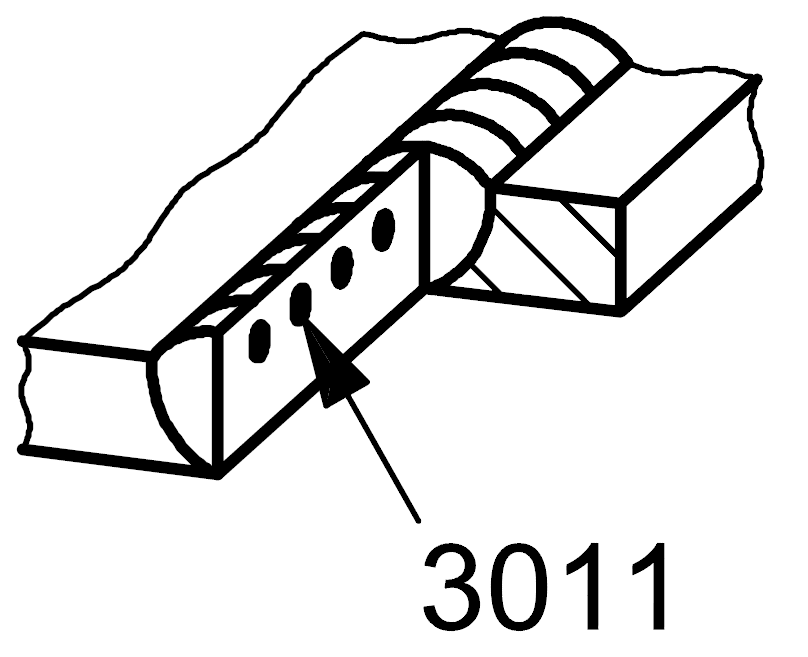
3011 |
Slag inclusion |
Solid inclusion in the form of slag linear |

|
| 3 |
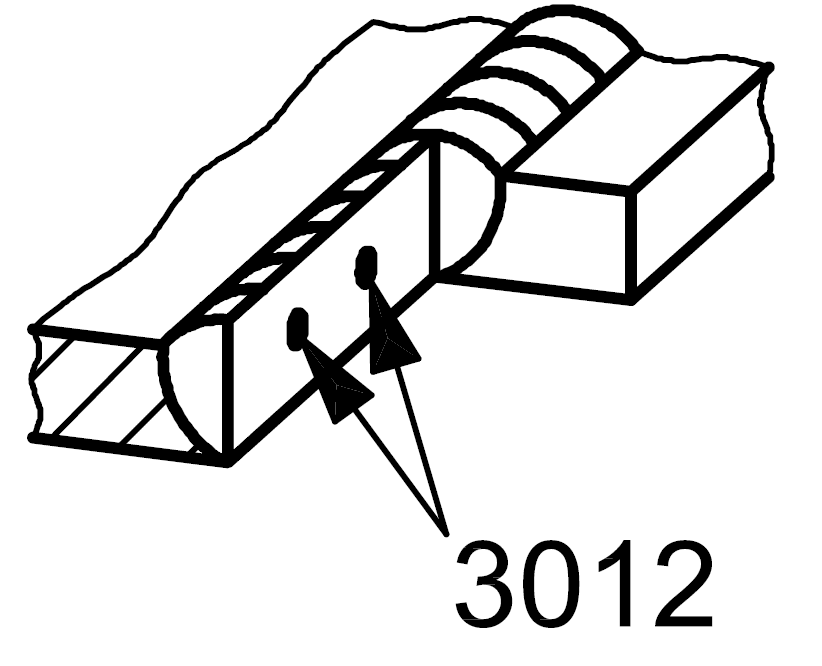
3012 |
Slag inclusion |
Solid inclusion in the form of slag isolated |

|
| 3 |
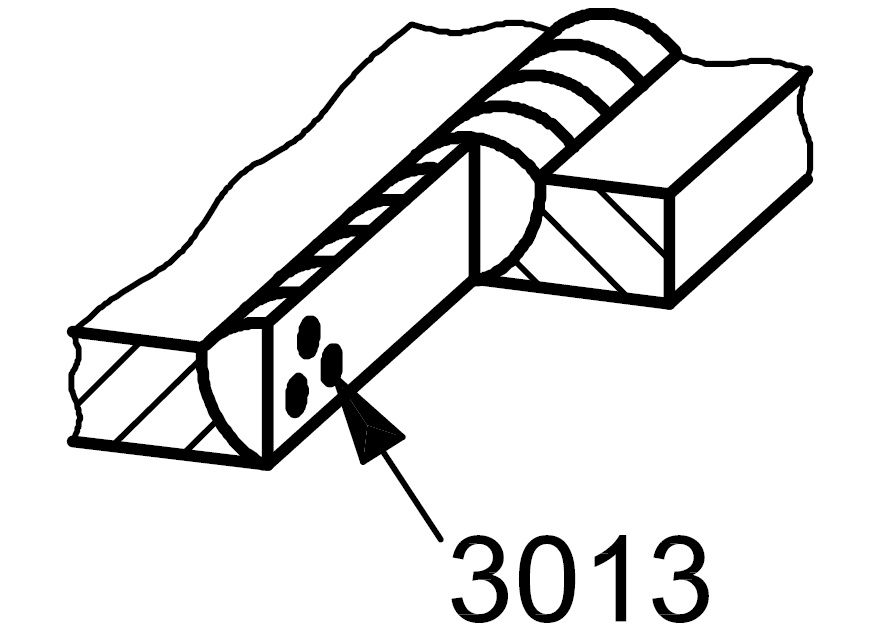
3013 |
Slag inclusion |
Solid inclusion in the form of slag clustered |

|
| 3 |
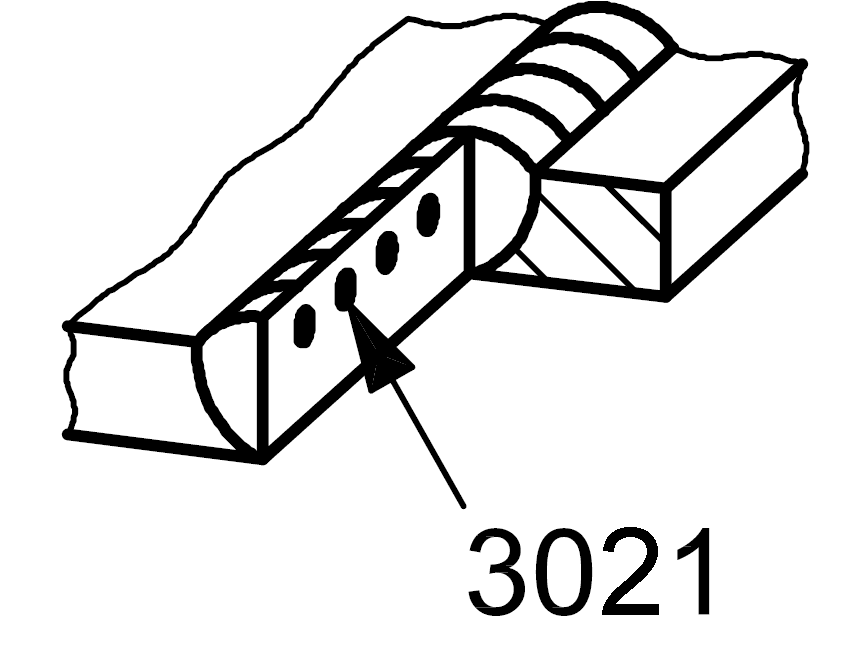
3021 |
Flux inclusion |
Solid inclusion in the form of flux linear
|

|
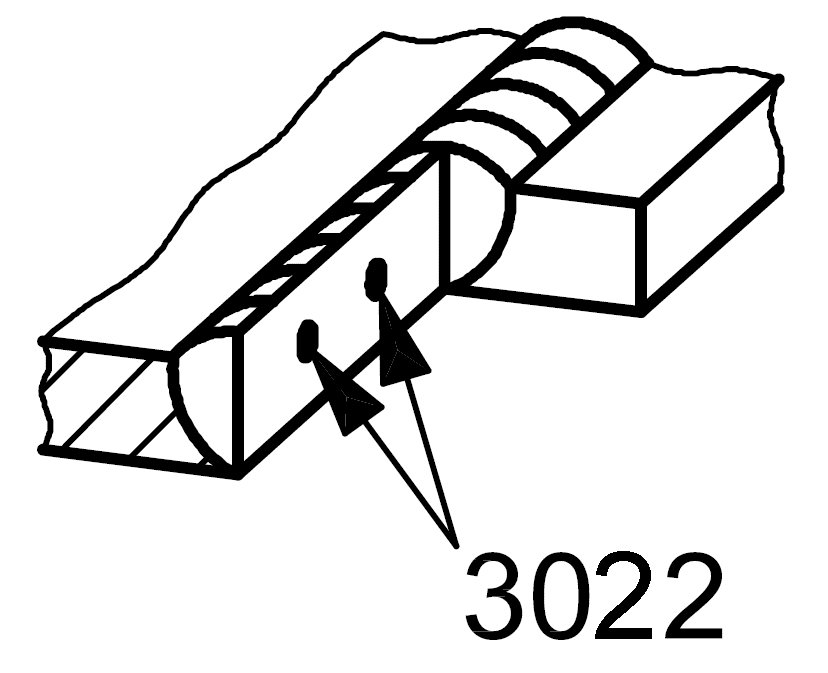
| 3 |
3022 |
Flux inclusion |
Solid inclusion in the form of flux isolated |

|
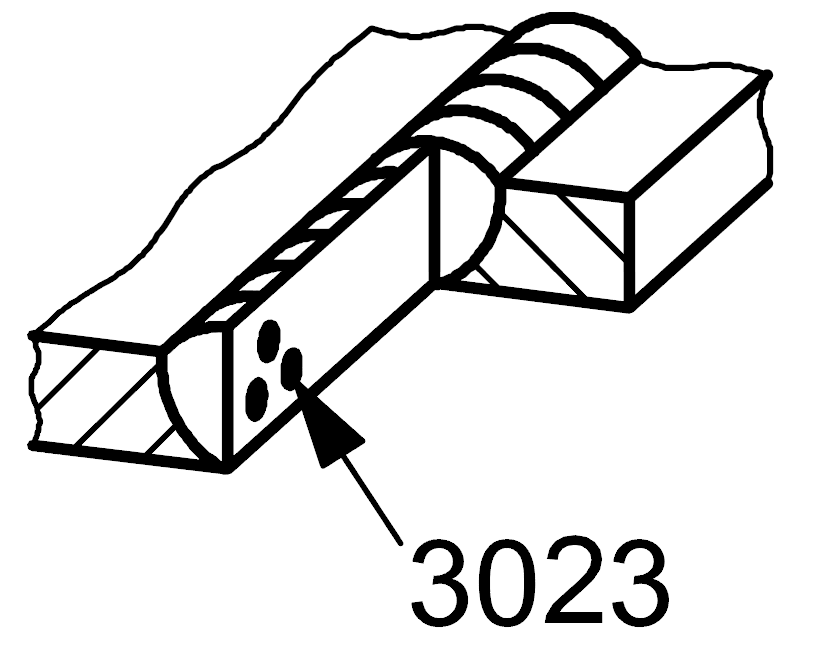
| 3 |
3023 |
Flux inclusion |
Solid inclusion in the form of flux clustered |

|
| 3 |
3031 |
Oxide inclusion |
Solid inclusion in the form of oxide linear |
|
| 3 |
3032 |
Oxide inclusion |
Solid inclusion in the form of oxide isolated |
|
| 3 |
3033 |
Oxide inclusion |
Solid inclusion in the form of oxide clustered |
|
| 3 |
3034 |
Puckering |
In certain cases, especially in aluminium alloys, gross oxide film enfoldment can occur due to a combination of unsatisfactory protection from atmospheric contamination and turbulence in the weld pool
|
|
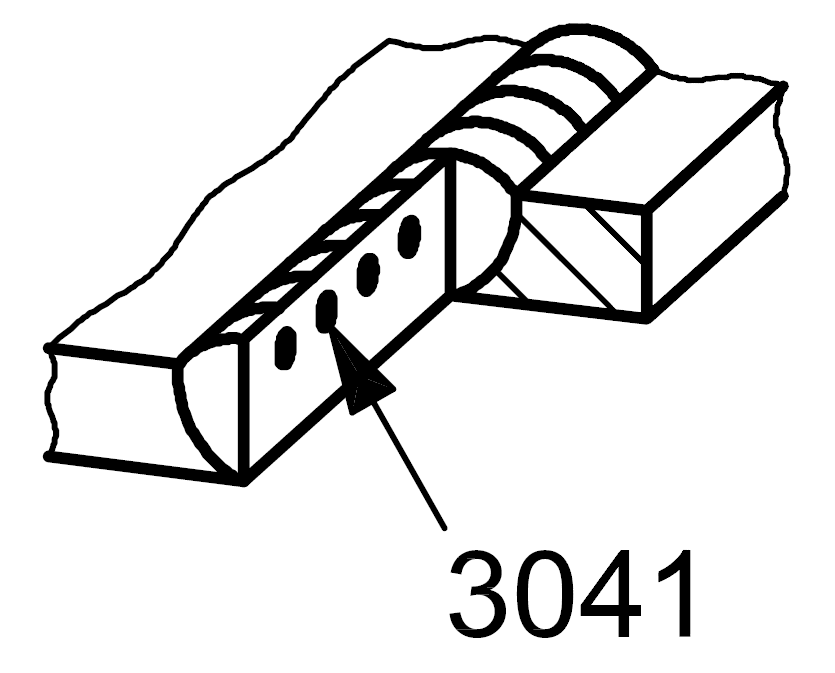
| 3 |
3041 |
Metal inclusion |
Solid inclusion of tungsten |

|
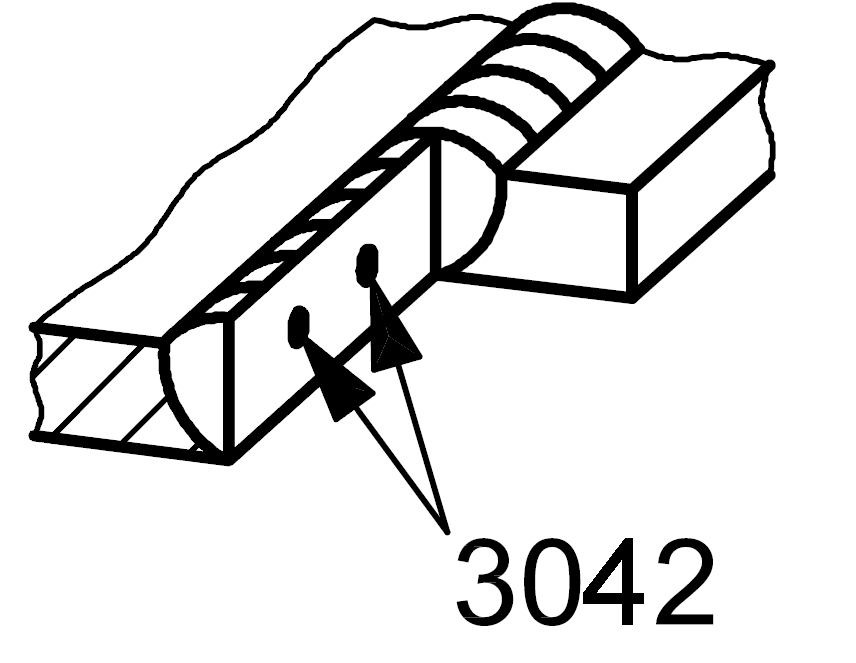
| 3 |
3042 |
Metal inclusion |
Solid inclusion of copper |

|
| 3 |
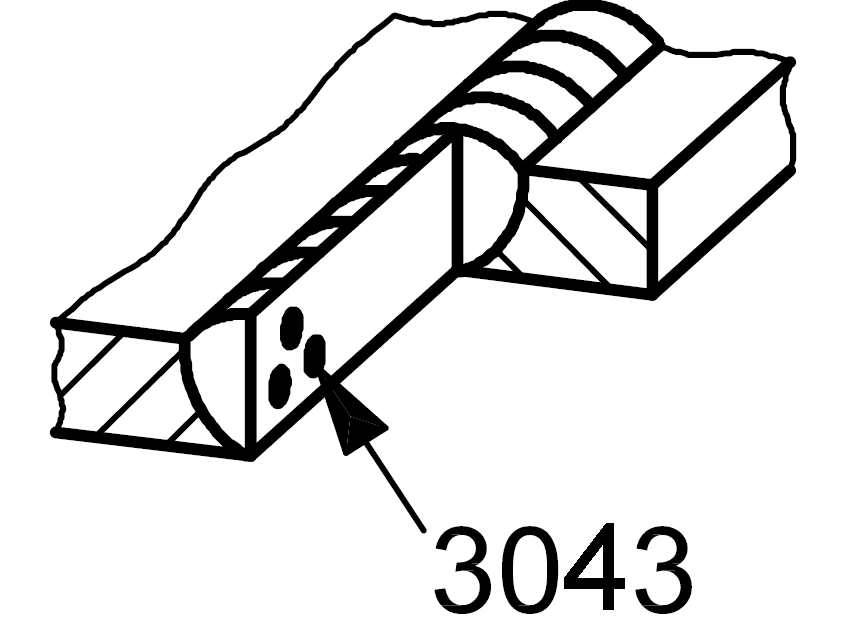
3043 |
Metal inclusion |
Solid inclusion of other metal |

|
| 4 |
400 |
Lack of fusion and penetration |
Lack of fusion and penetration |
|
| 4 |
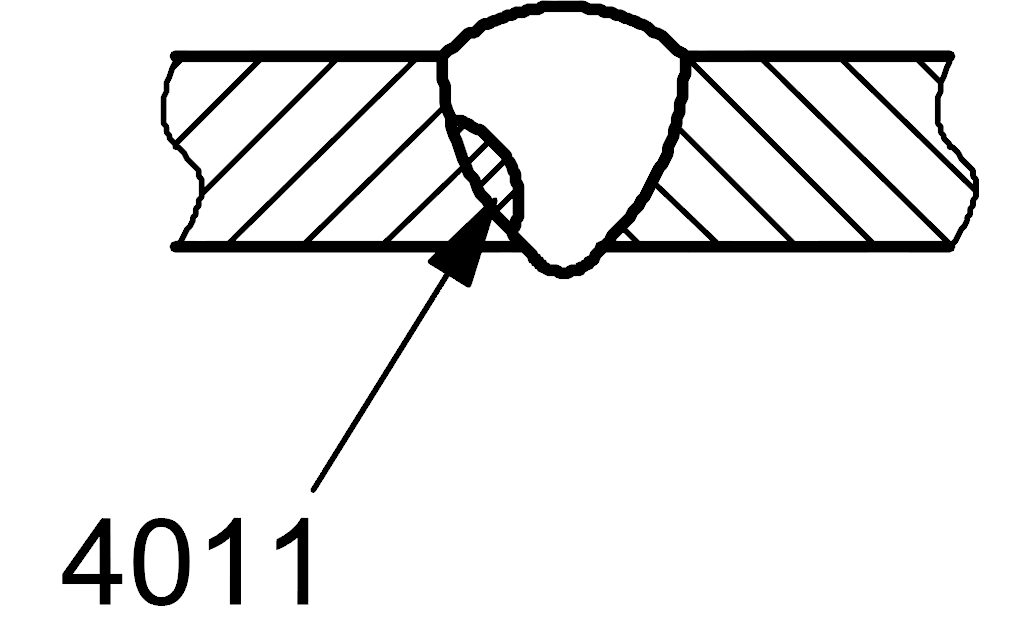
4011 |
Lack of fusion |
Lack of side-wall fusion |

|
| 4 |
4012 |
Lack of fusion |
Lack of inter-run fusion
|

|
| 4 |
4013 |
Lack of fusion |
Lack of root fusion |
|
| 4 |
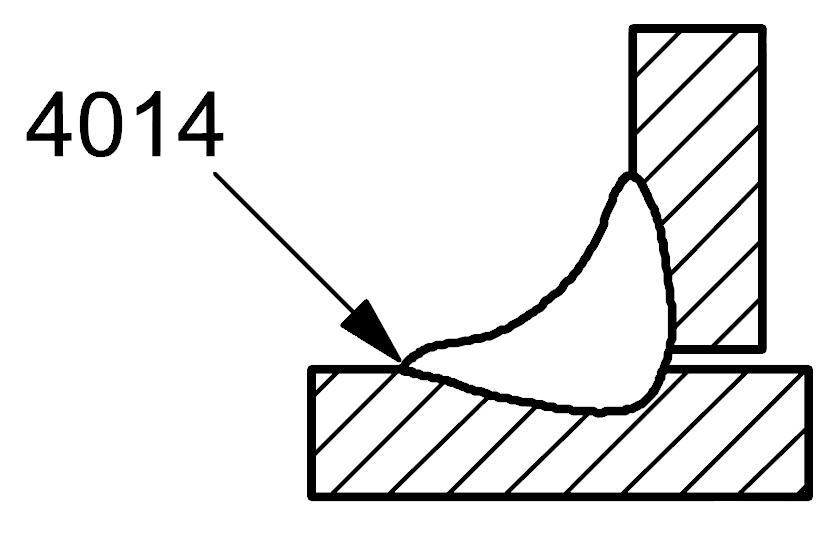
4014 |
Lack of fusion |
Micro-lack of fusion |

|
| 4 |
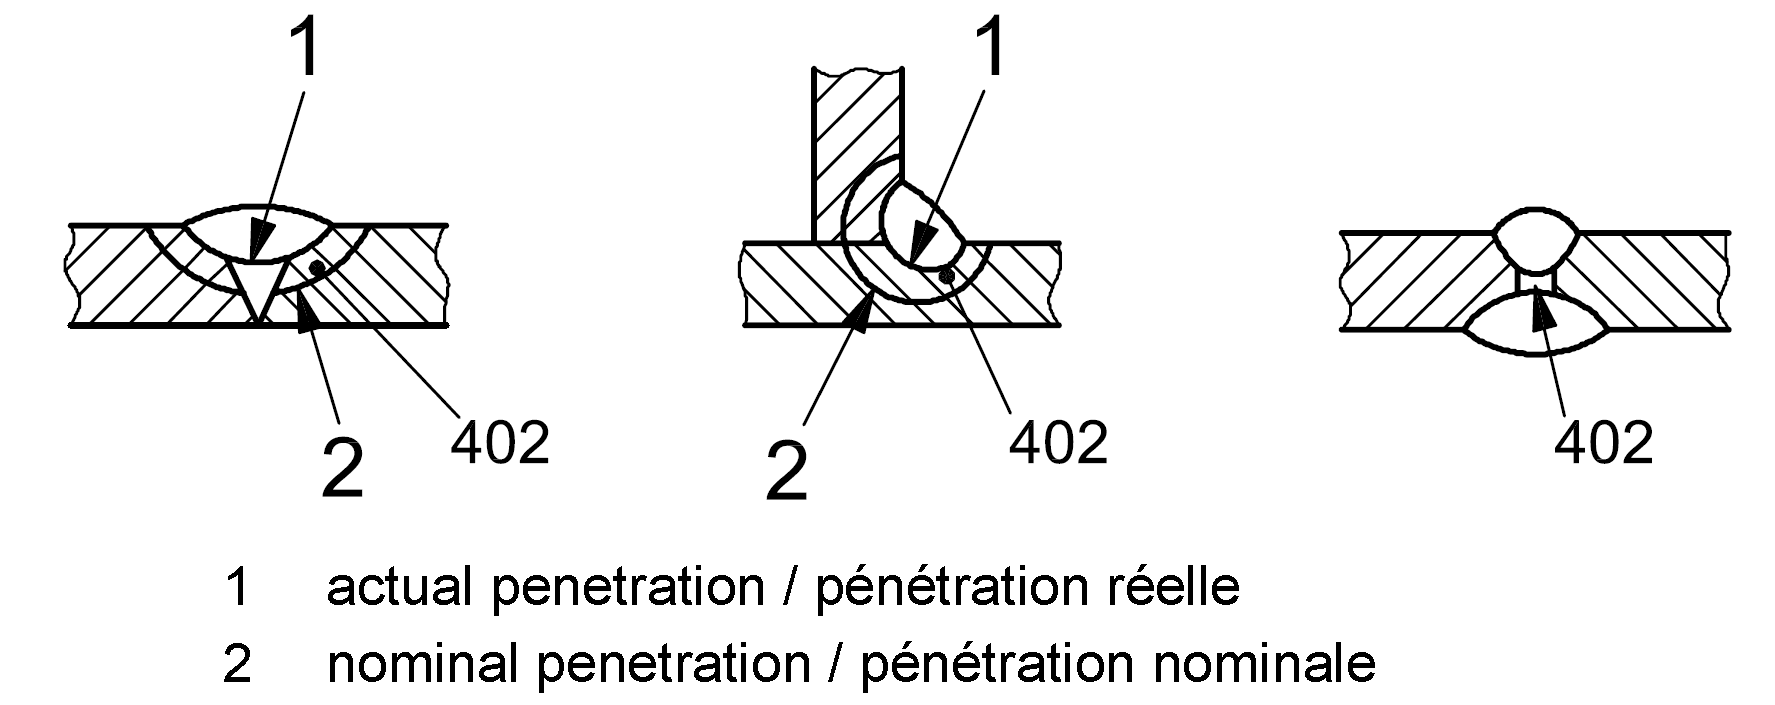
402 |
Incomplete penetration (lack of penetration) |
Difference between the actual and the nominal penetration
|

|
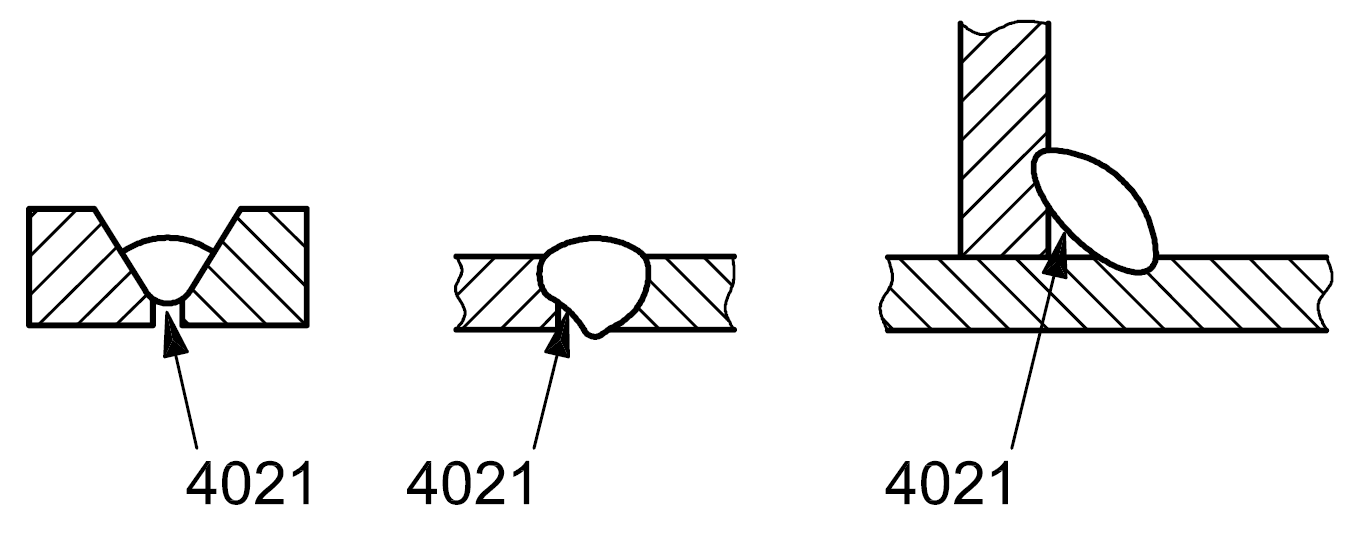
| 4 |
4021 |
Incomplete root penetration |
One or both fusion faces of the root are not melted |

|
| 4 |
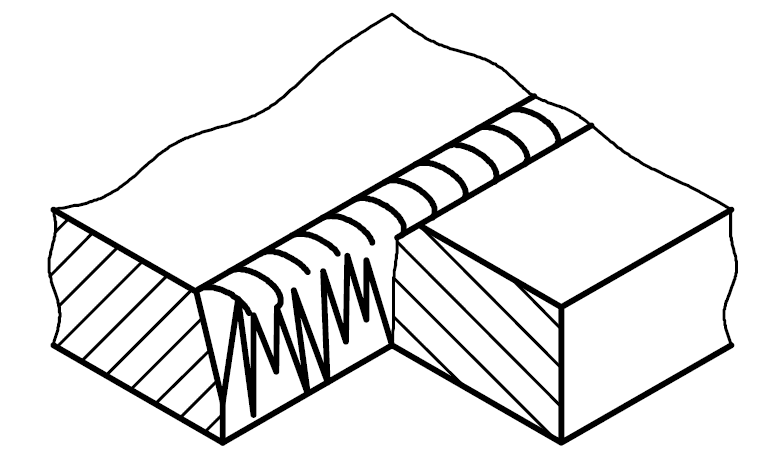
403 |
Spiking |
Extremely non-uniform penetration occurring in electron-beam and laser welding giving a sawtooth appearance. This can include cavities, cracks, shrinkages, etc
|

|
| 5 |
500 |
Imperfect shape |
Imperfect shape of the external surfaces of the weld or defective joint geometry
|
|
| 5 |
5011 |
continuous undercut |
Undercut of significant length without interruption |

|
| 5 |
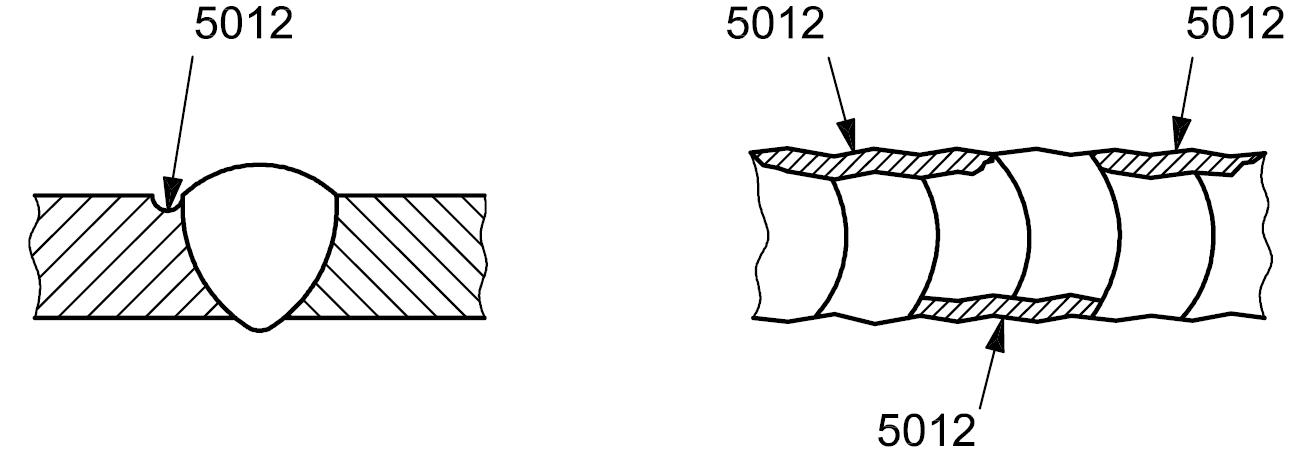
5012 |
Intermittent undercut |
Short length of undercut, intermittent along the weld
|

|
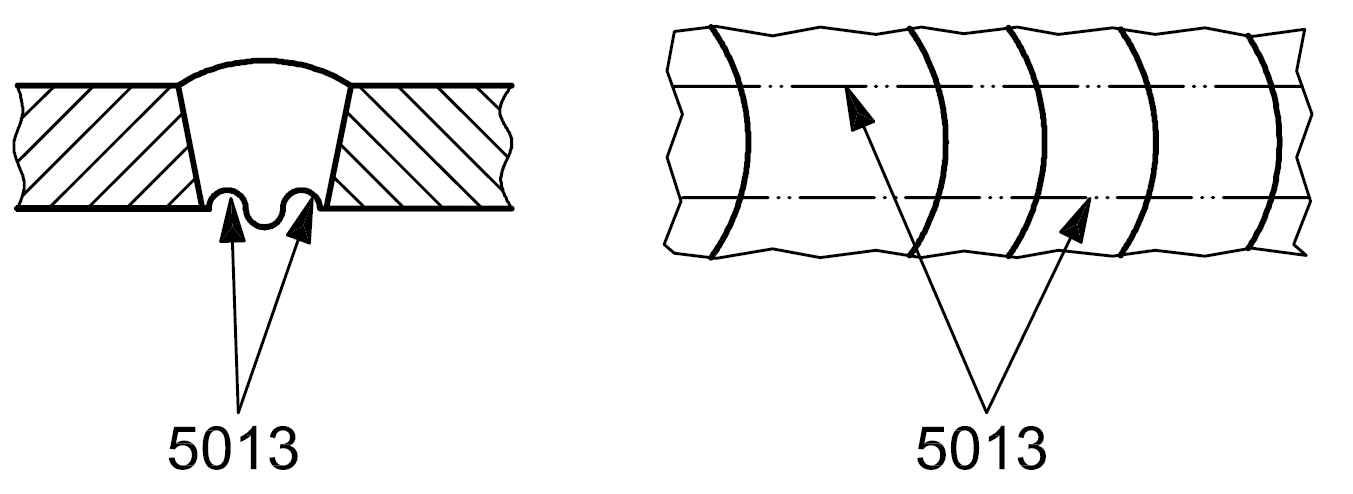
| 5 |
5013 |
Shrinkage grooves |
Undercuts visible on each side of the root run |

|
| 5 |
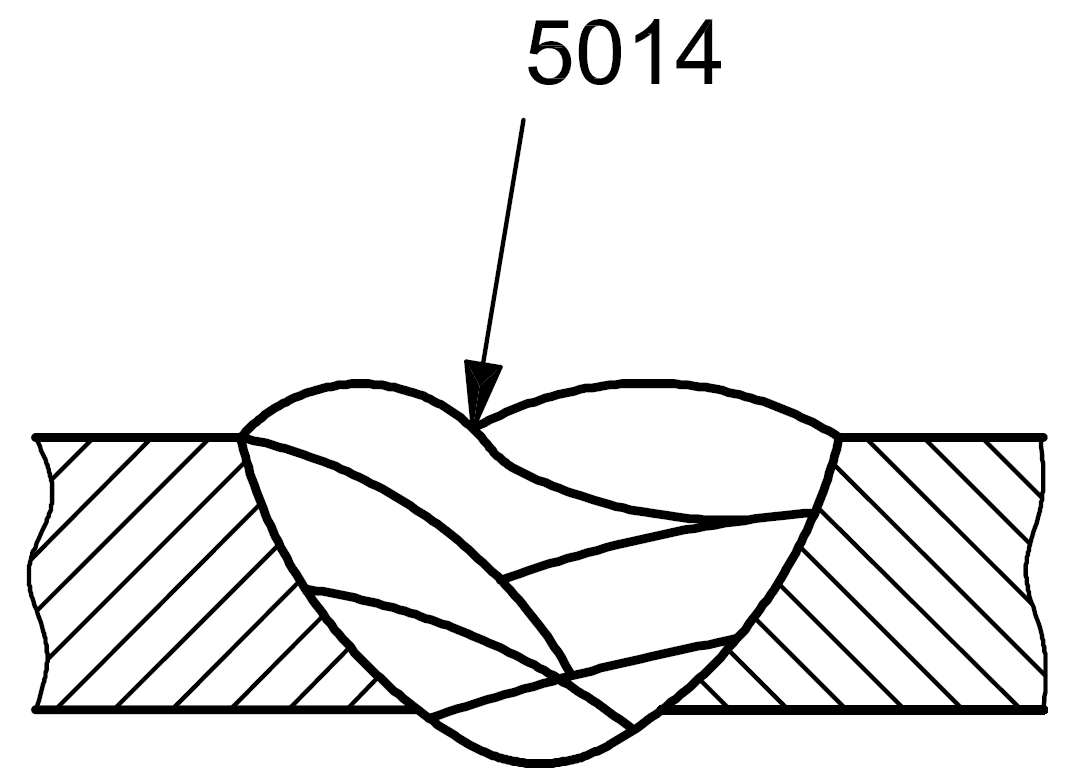
5014 |
Inter-run undercut (interpass undercut) |
Undercut in the longitudinal direction between weld runs
|

|
| 5 |
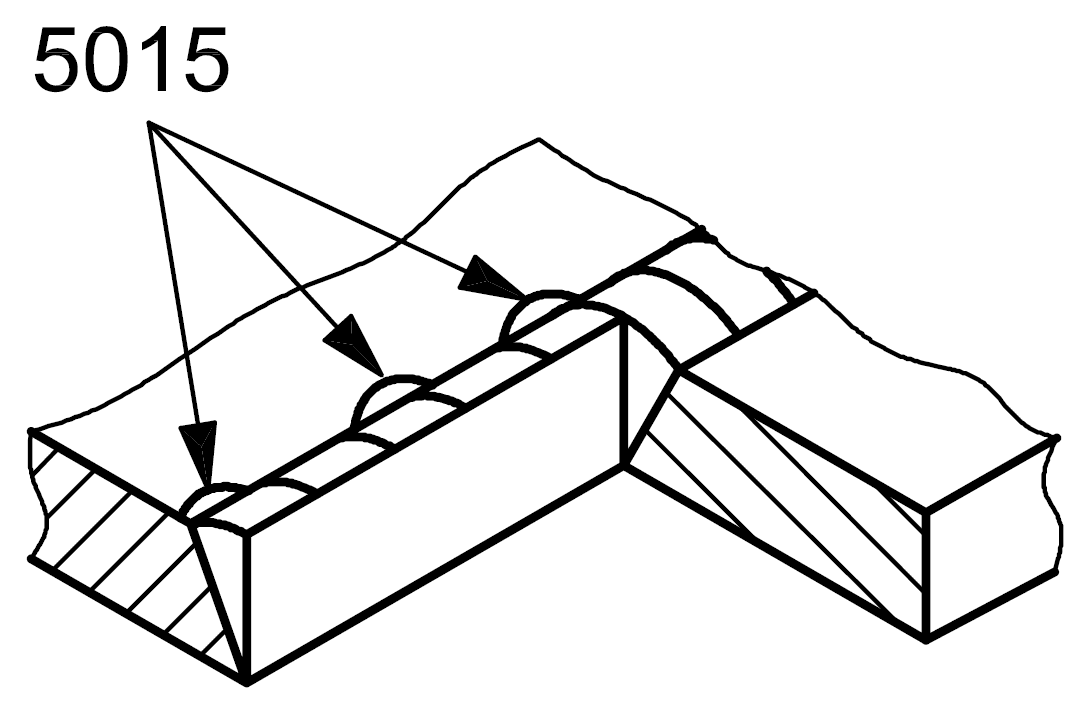
5015 |
Local intermittent undercut |
Short undercuts, irregularly spaced, on the side or on the surface of the weld runs
|

|
| 5 |
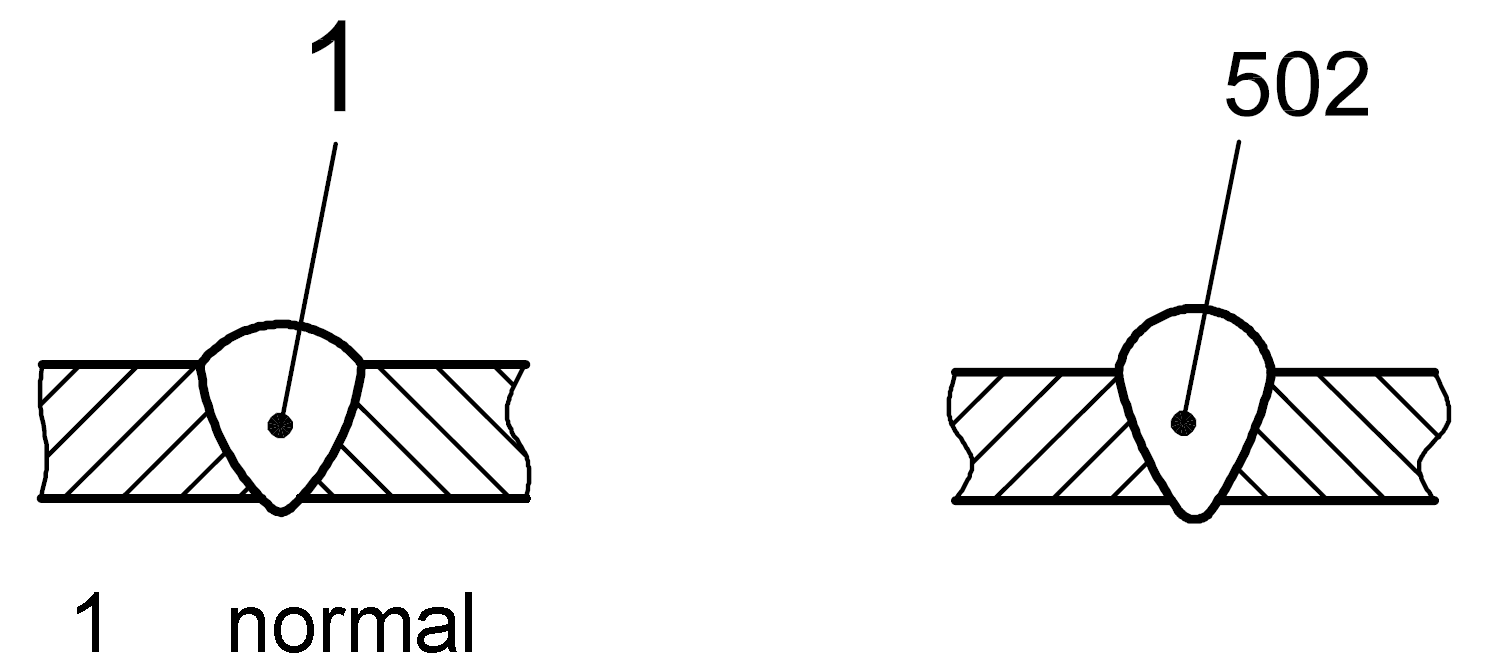
502 |
Excess weld metal |
Reinforcement of the butt weld on the face is too large
|

|
| 5 |
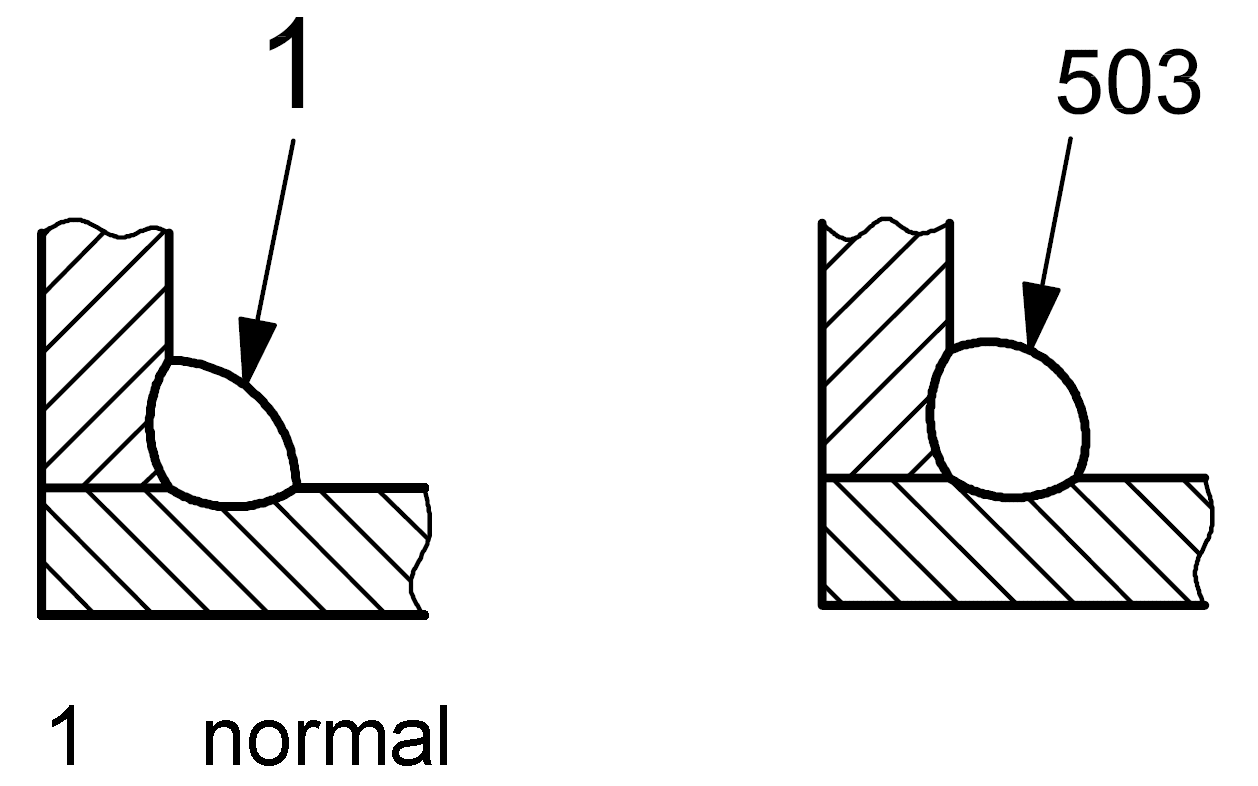
503 |
Excessive convexity |
Reinforcement of the fillet is too large |

|
| 5 |
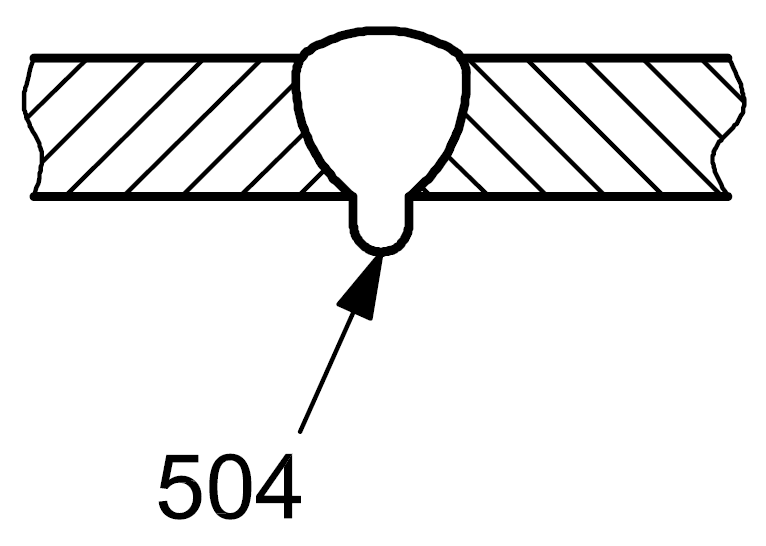
5041 |
Local excessive penetration |
Reinforcement of the butt weld on the root side is too large : local excessive penetration
|

|
| 5 |
5042 |
Continuous excessive penetration |
Reinforcement of the butt weld on the root side is too large : continuous excessive penetration
|

|
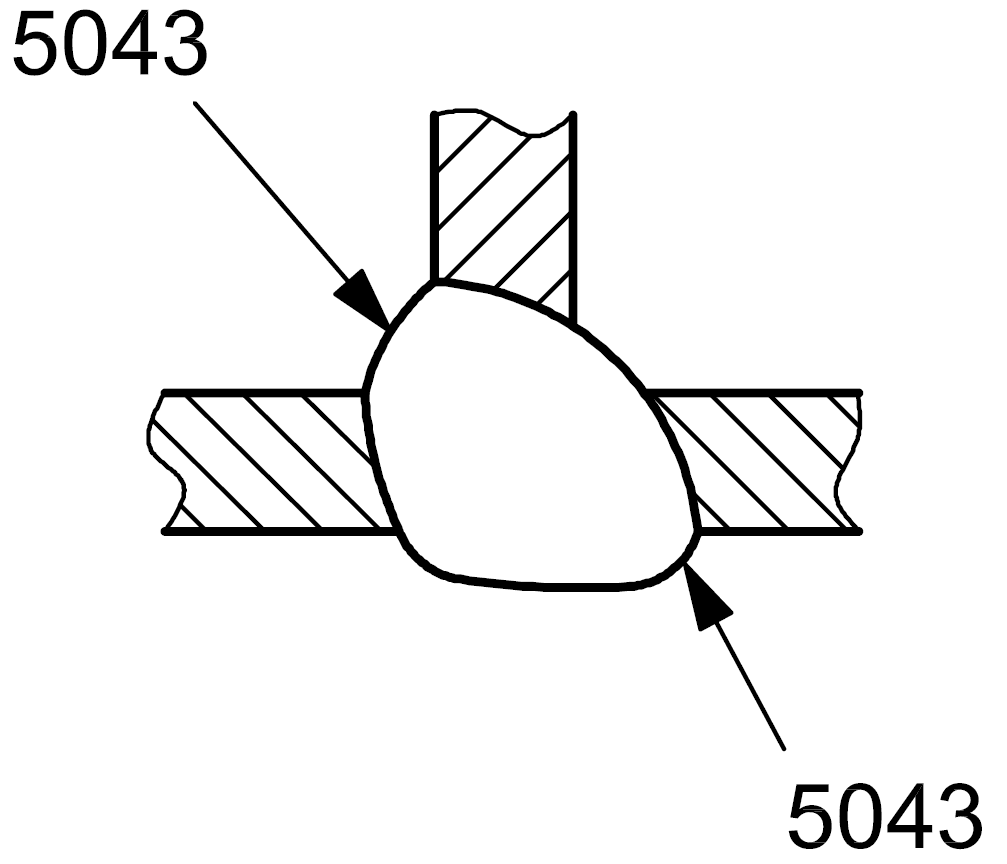
| 5 |
5043 |
Excessive melt-through |
Reinforcement of the butt weld on the root side is too large : excessive melt-through
|

|
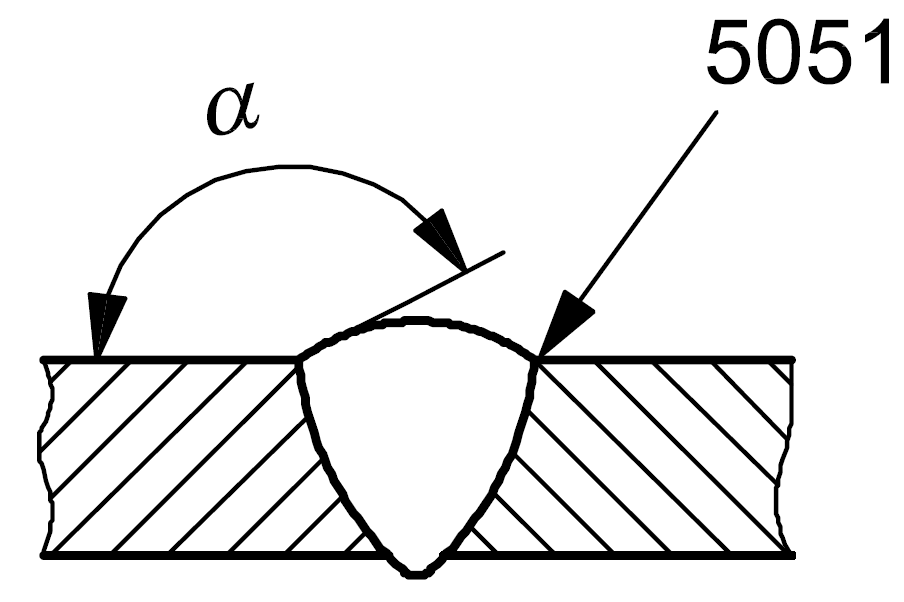
| 5 |
5051 |
Incorrect weld toe angle |
Too small an angle (α) between the plane of the parent material surface and a plane tangential to the weldrun surface at the toe of the weld
|

|
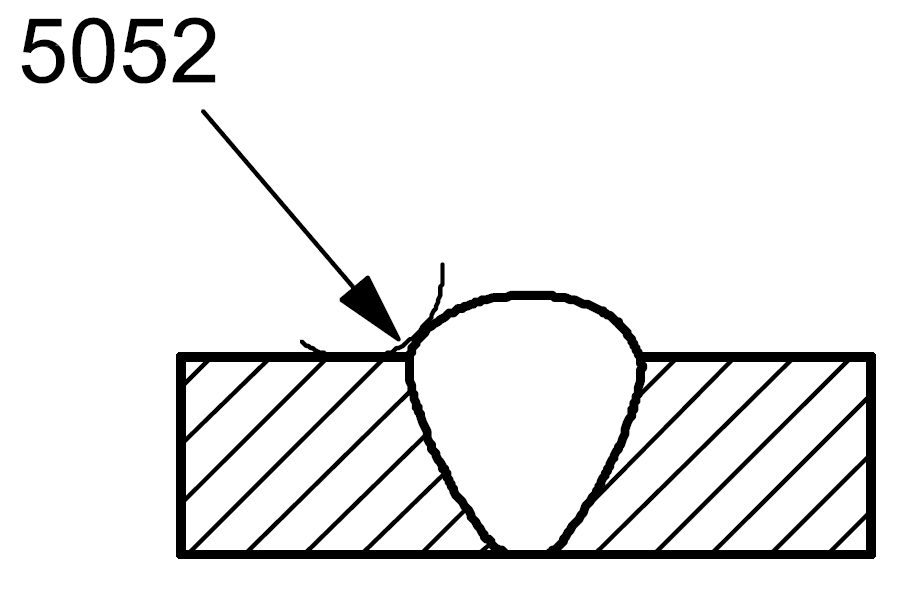
| 5 |
5052 |
Incorrect weld toe radius |
Too small a radius (r) at the toe of the weld |

|
| 5 |
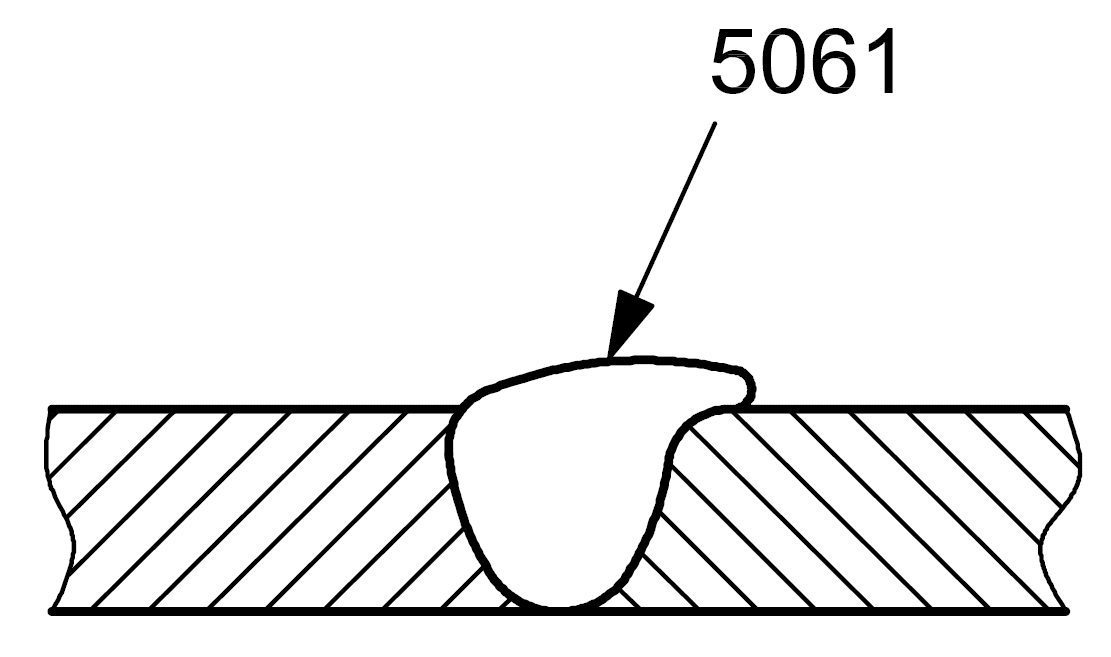
5061 |
Toe overlap |
Toe overlap at the weld toe |

|
| 5 |
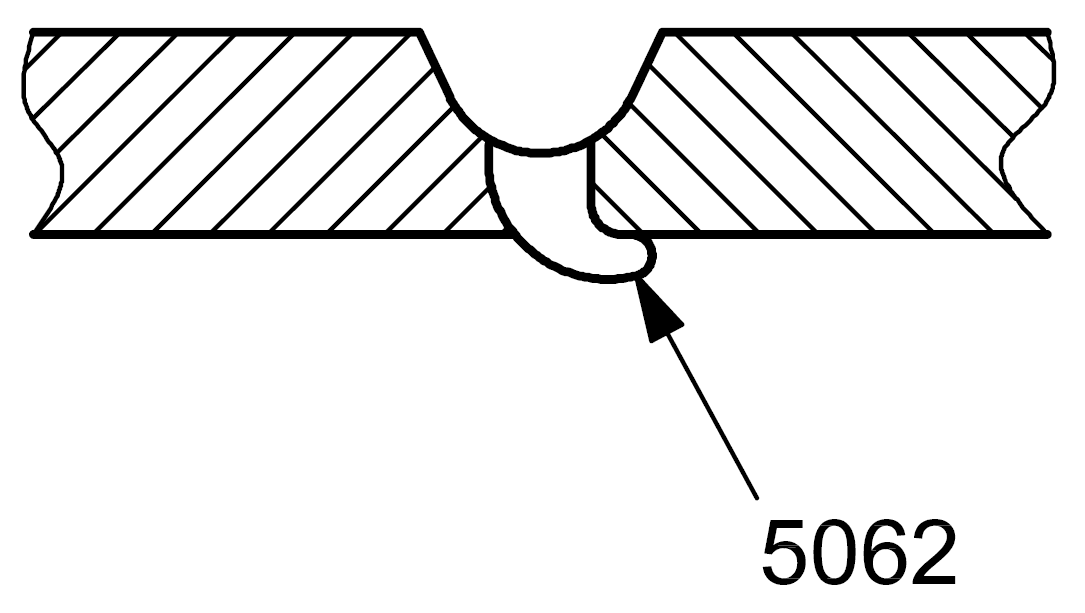
5062 |
Root overlap |
Root overlap at the weld root |

|
| 5 |
5071 |
Linear misalignment between plates |
Pieces are plates |

|
| 5 |
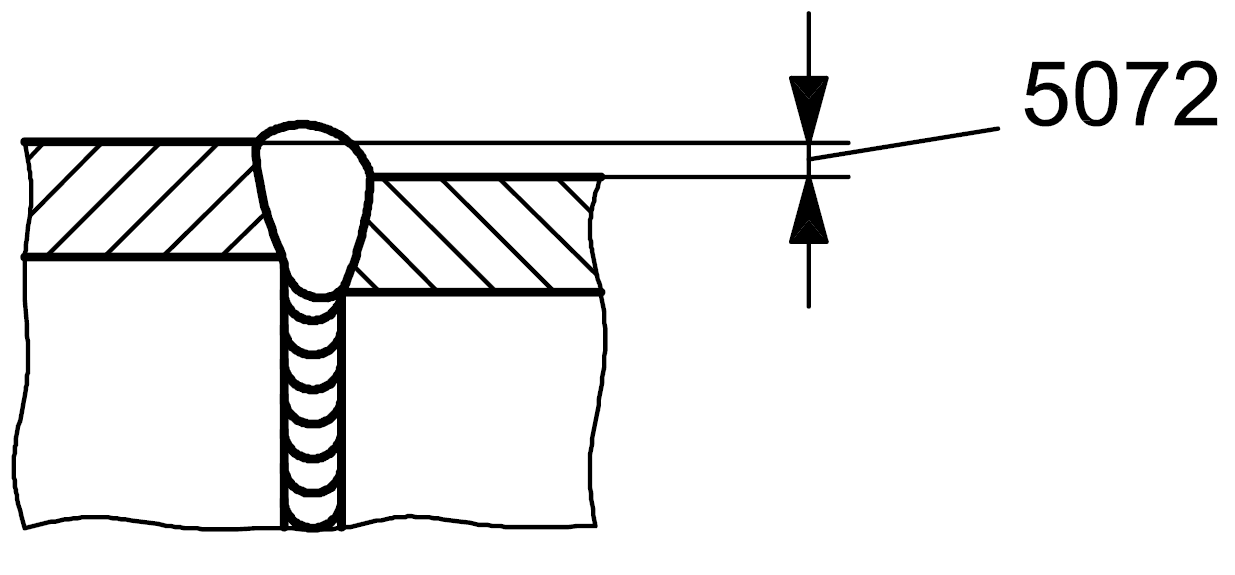
5072 |
Linear misalignment between tubes |
Pieces are tubes |

|
| 5 |
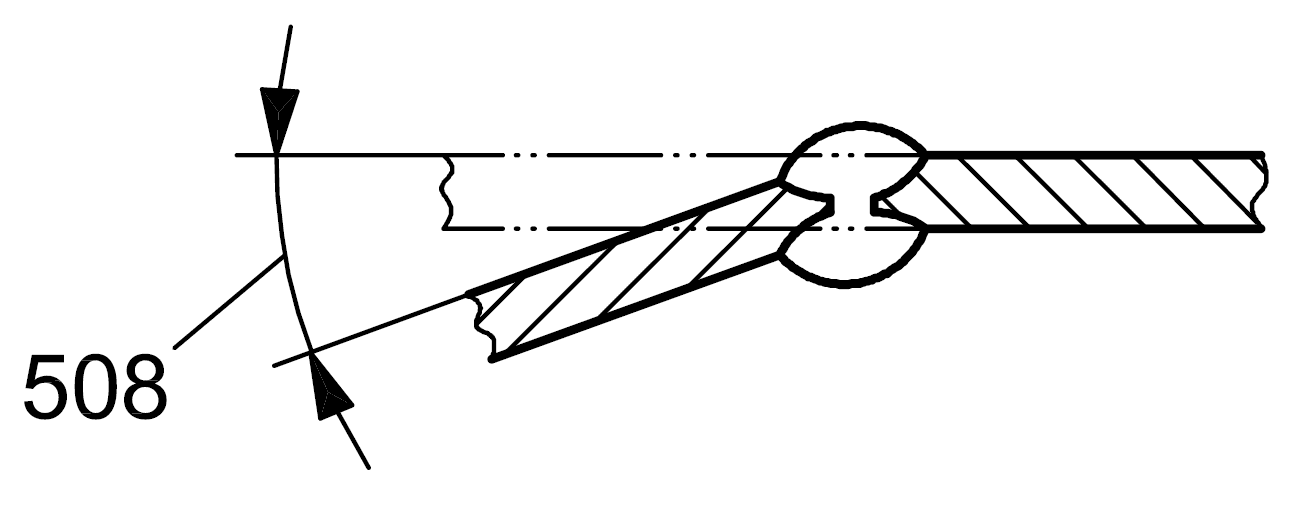
508 |
Angular misalignment |
Misalignment between two welded pieces such that their surface planes are not parallel or at the intended angle
|

|
| 5 |
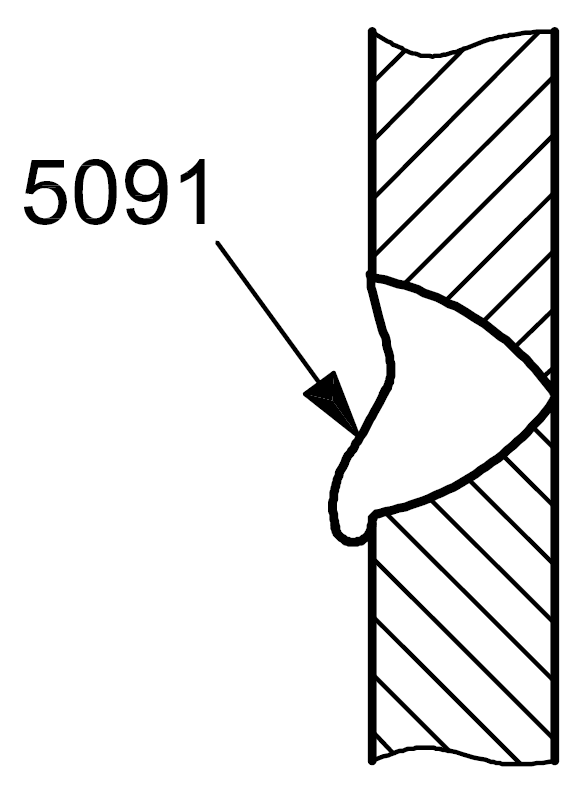
5091 |
Sagging in the horizontal position |
Sagging in the horizontal position |

|
| 5 |
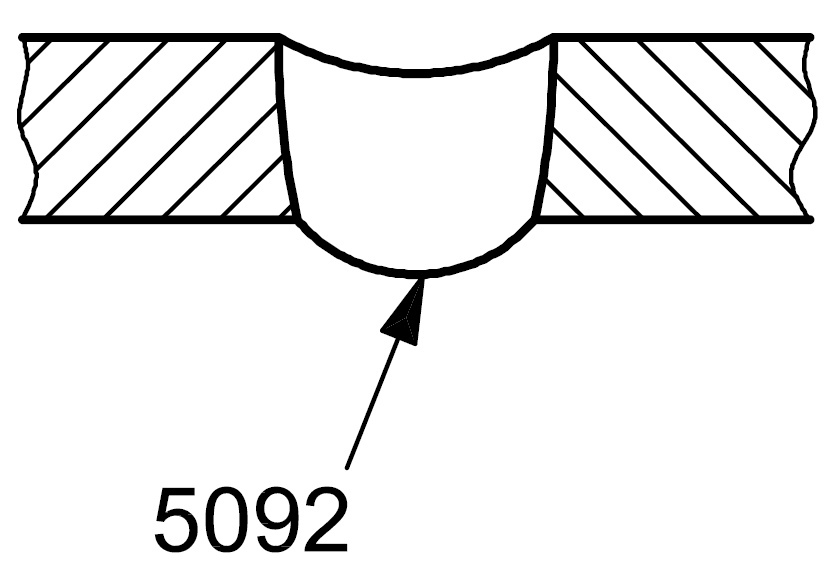
5092 |
Sagging in the flat or overhead position |
Sagging in the flat or overhead position |

|
| 5 |
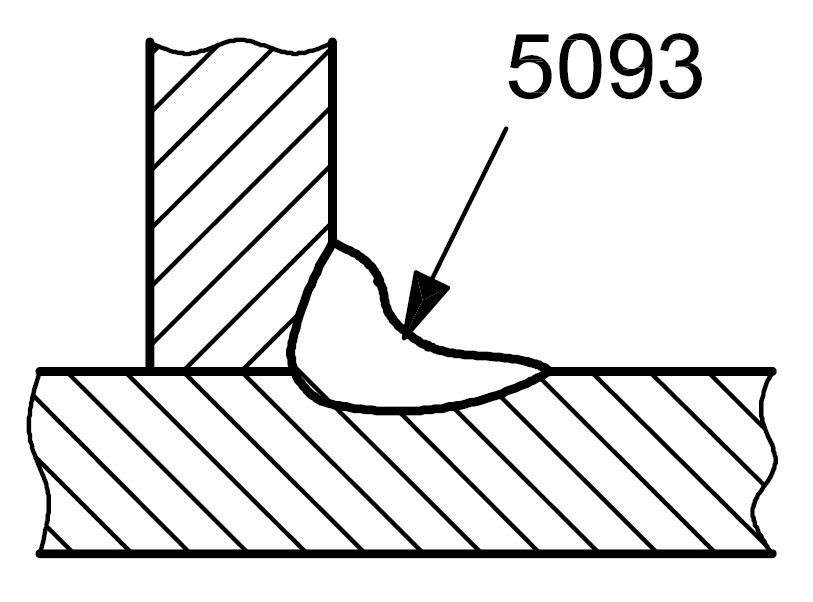
5093 |
Sagging in a fillet weld |
Sagging in a fillet weld |

|
| 5 |
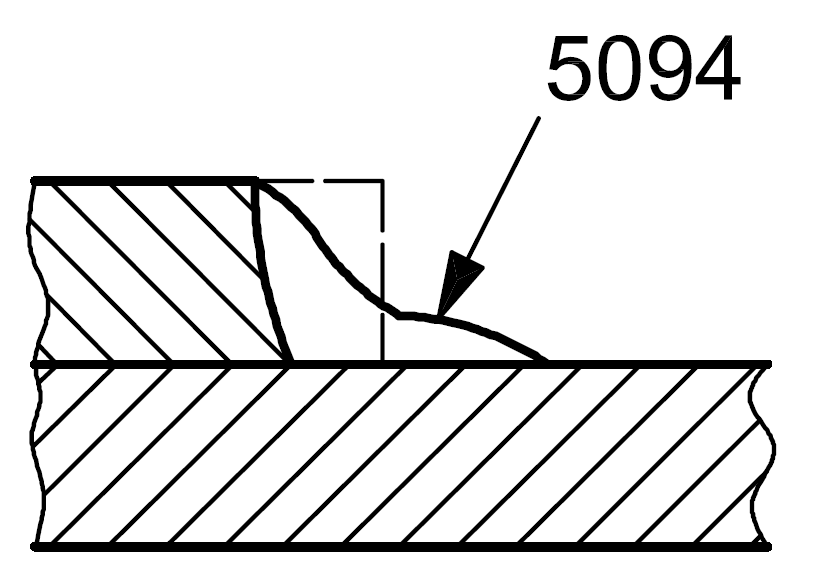
5094 |
Sagging (melting) at the edge of the weld |
Sagging (melting) at the edge of the weld |

|
| 5 |
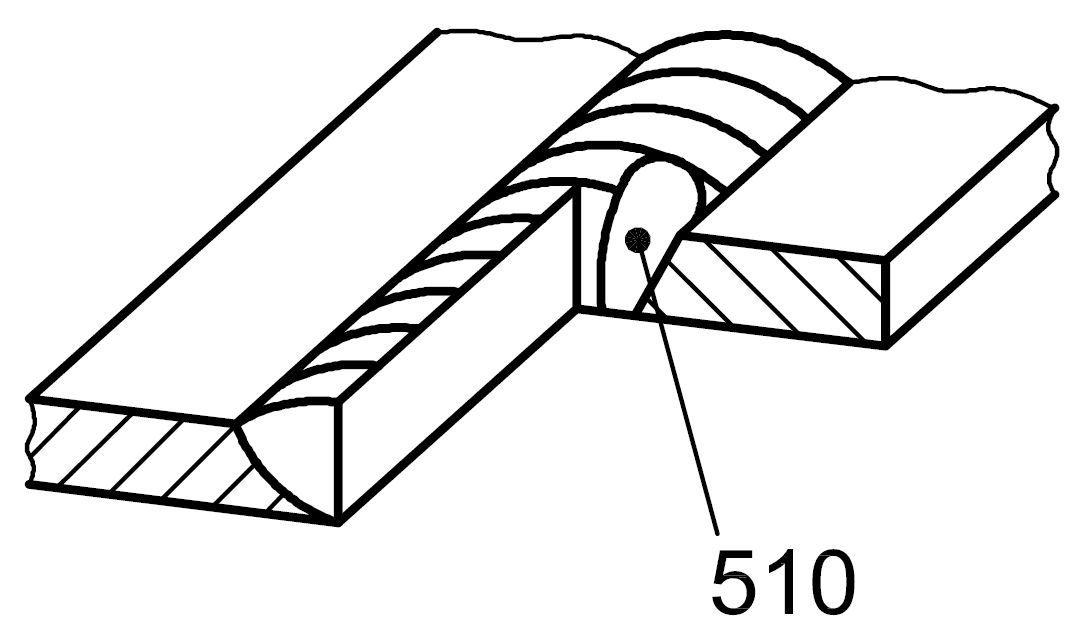
510 |
Burn-through |
Collapse of the weld pool resulting in a hole in the weld
|

|
| 5 |
511 |
Incompletely filled groove |
Longitudinal continuous or intermittent channel in the surface of a weld due to insufficient deposition of weld filler material
|

|
| 5 |
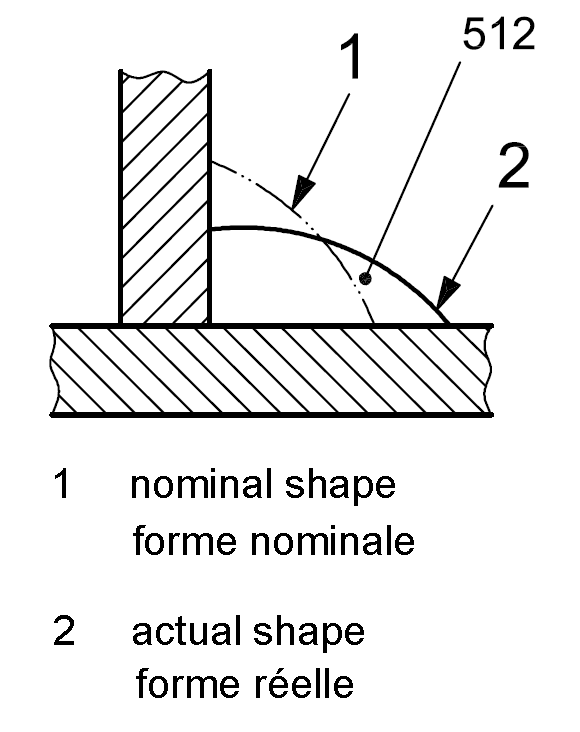
512 |
Excessive asymmetry of fillet weld (excessive unequal leg length) |
Explanation not necessary |

|
| 5 |
513 |
Irregular width |
Excessive variation in width of the weld |
|
| 5 |
514 |
Irregular surface |
Excessive surface roughness |
|
| 5 |
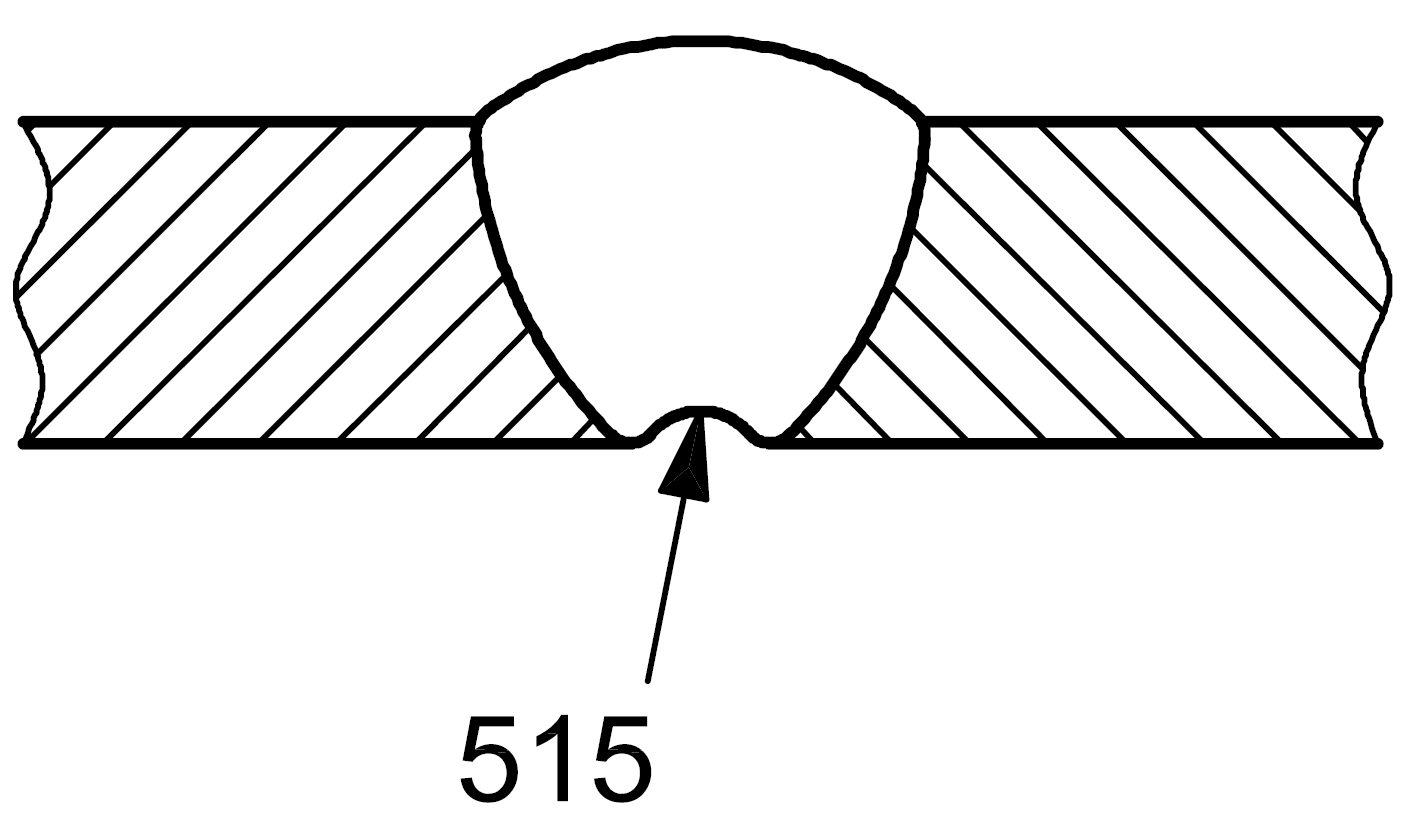
515 |
Root concavity |
Shallow groove due to shrinkage of a butt weld at the root (see also 5013)
|

|
| 5 |
516 |
Root porosity |
Spongy formation at the root of a weld due to bubbling of the weld metal at the moment of solidification
|
|
| 5 |
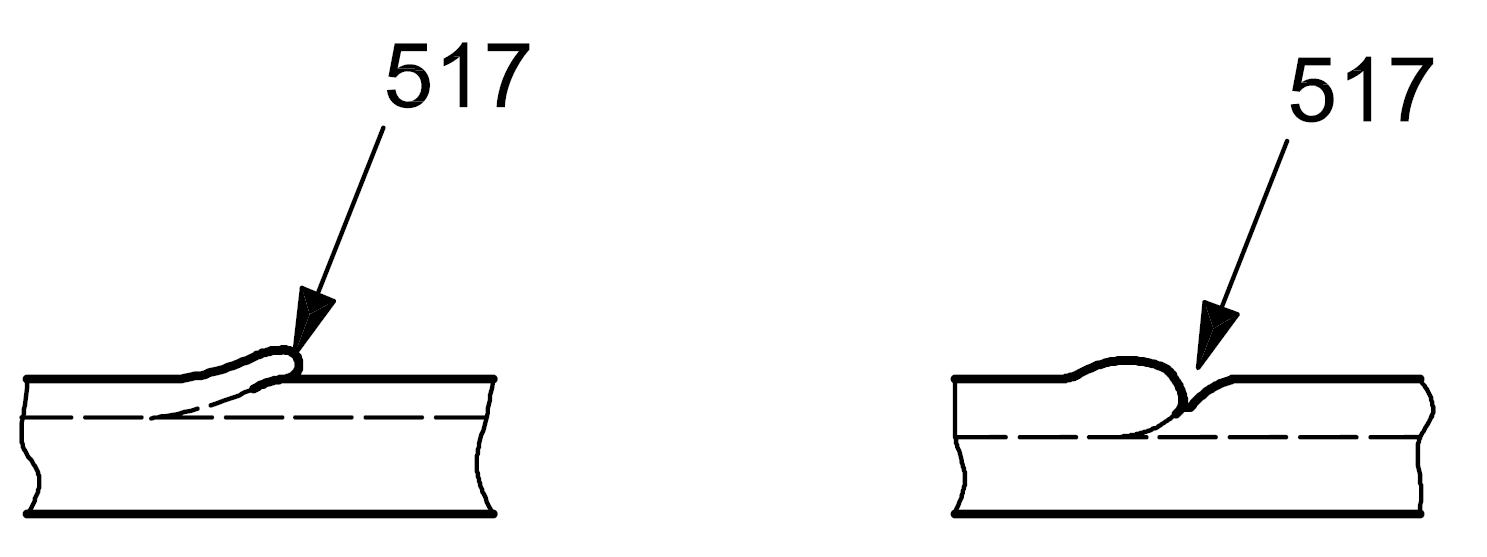
517 |
Poor restart |
Local surface irregularity at a weld restart |

|
| 5 |
5171 |
Poor restart in the capping run |
Poor restart in the capping run |

|
| 5 |
5172 |
Poor restart in the root run |
Poor restart in the root run |

|
| 5 |
520 |
Excessive distortion |
Dimensional deviation due to shrinkage and distortion of welds
|
|
| 5 |
5211 |
Excessive weld thickness |
Weld thickness is too large |

|
| 5 |
5212 |
Excessive weld width |
Weld width is too large |

|
| 5 |
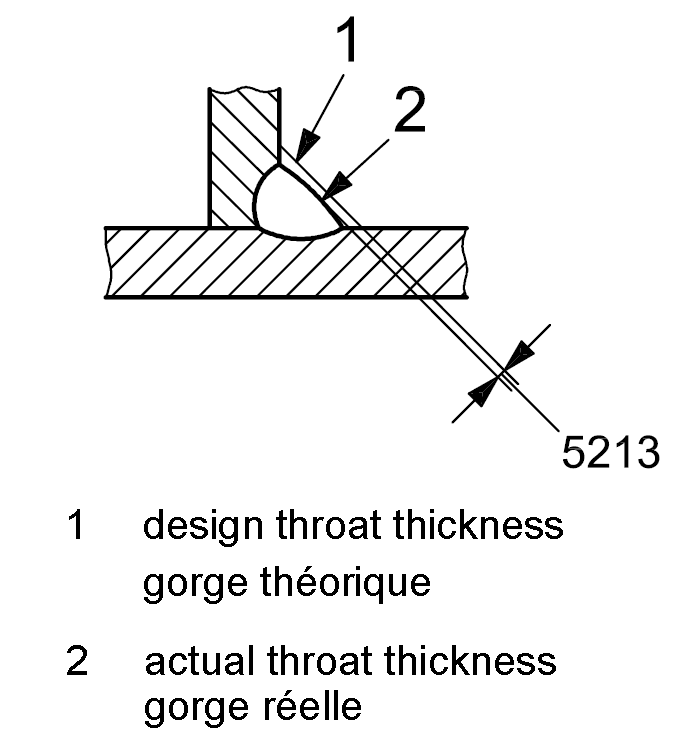
5213 |
Insufficient throat thickness |
Actual throat thickness of the fillet weld is too small |

|
| 5 |
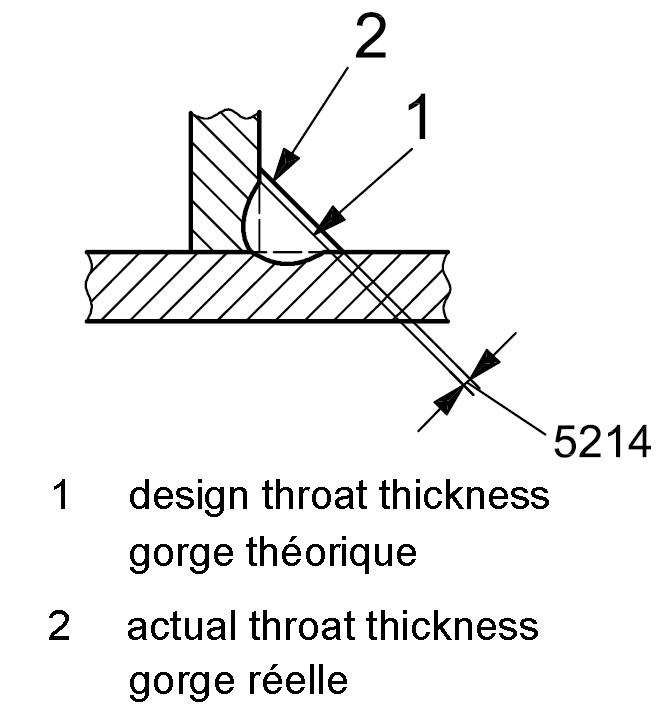
5214 |
Excessive throat thickness |
Actual throat thickness of the fillet weld is too large |

|
| 6 |
600 |
Miscellaneous imperfections |
All imperfections which cannot be included in groups 1 to 5 |
|
| 6 |
601 |
Arc strike stray arc |
Local damage to the surface of the parent material adjacent to the weld, resulting from arcing or striking the arc outside the joint preparation
|
|
| 6 |
602 |
Spatter |
Globules of weld metal or filler metal expelled during welding and adhering to the surface of parent material or solidified weld metal
|
|
| 6 |
6021 |
Tungsten spatter |
Particles of tungsten transferred from the electrode to the surface of parent material or solidified weld metal
|
|
| 6 |
603 |
Torn surface |
Surface damage due to the removal by fracture of temporary welded attachments
|
|
| 6 |
604 |
Grinding mark |
Local damage due to grinding |
|
| 6 |
605 |
Chipping mark |
Local damage due to use of a chisel or other tools
|
|
| 6 |
606 |
Underflushing |
Reduction in the thickness of the workpiece due to excessive grinding
|
|
| 6 |
607 |
Tack weld imperfection |
Imperfection resulting from defective tack welding |
|
| 6 |
6071 |
Tack weld imperfection |
Broken run or no penetration |
|
| 6 |
6072 |
Tack weld imperfection |
Defective tack has been overwelded |
|
| 6 |
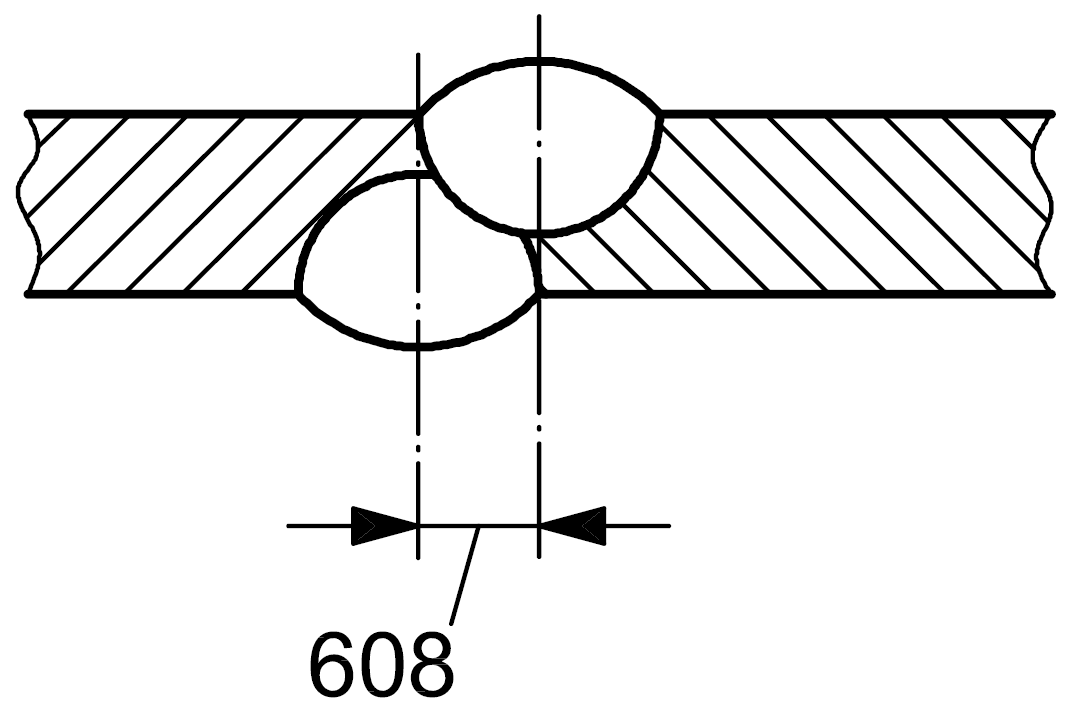
608 |
Misalignment of opposite runs |
Difference between the centrelines of two runs made from opposite sides of the joint |

|
| 6 |
610 |
Temper colours (visible oxide film) |
Lightly oxidized surface in the weld zone, e.g. in stainless steels
|
|
| 6 |
6101 |
Discolouration |
Visibly tinted surface layers in the weld metal and heataffected zone caused by the weld heat and/or by lack of protection, e.g. in titanium
|
|
| 6 |
613 |
Scaled surface |
Heavily oxidized surface in the weld zone |
|
| 6 |
614 |
Flux residue |
Flux residue that is not sufficiently removed from the surface |
|
| 6 |
615 |
Slag residue |
Adherent slag that is not sufficiently removed from the surface of the weld
|
|
| 6 |
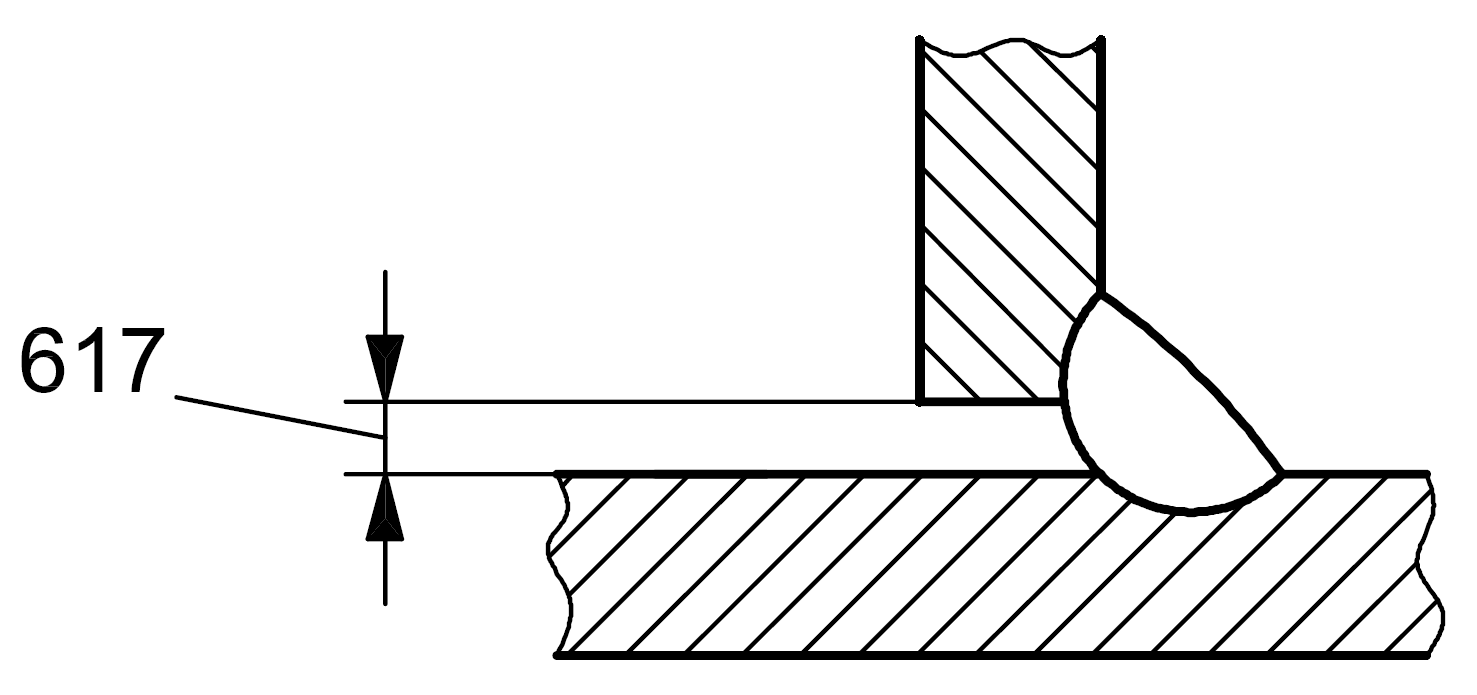
617 |
Incorrect root gap for fillet welds |
Excessive or insufficient gap between the parts to be joined |

|
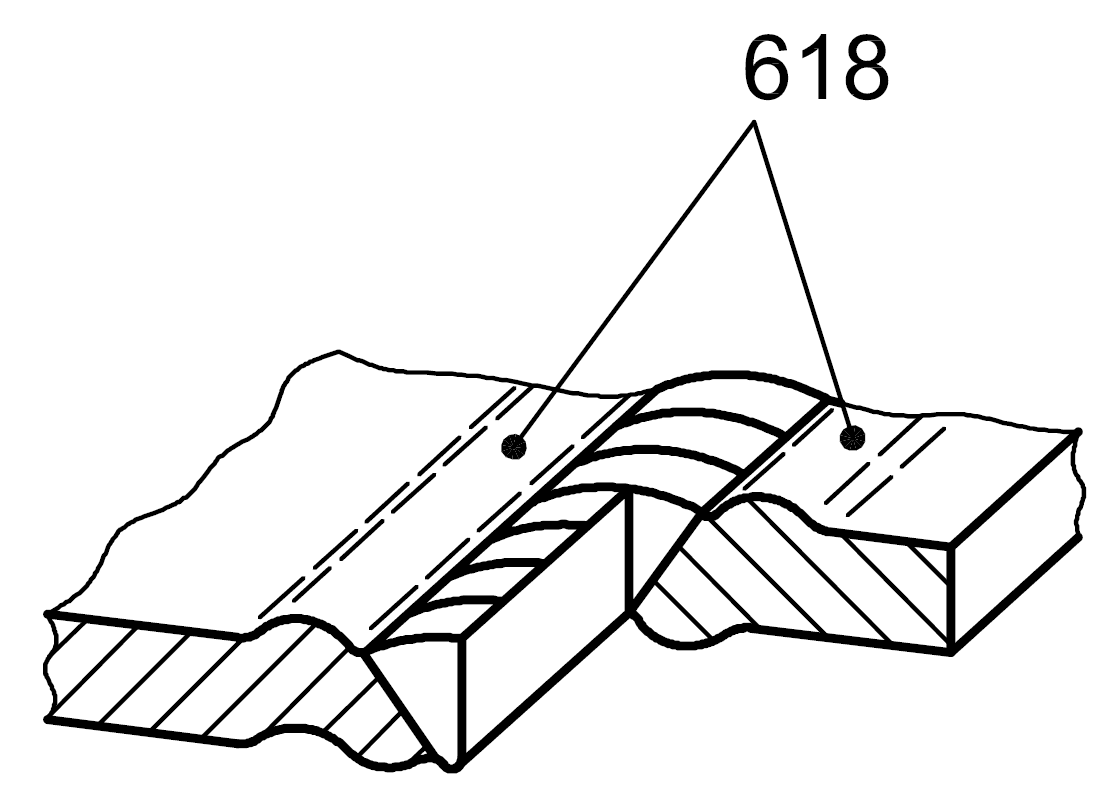
| 6 |
618 |
Swelling |
Imperfection due to a burning on welded joints in light alloys resulting from a prolonged holding time in the solidification stage
|

|
